
You have found www.hamrx8.com
Copyright.... Website created & maintained by GHQP

 |
 |
 |
 |
 |
 |
 |
 |
 |
 |
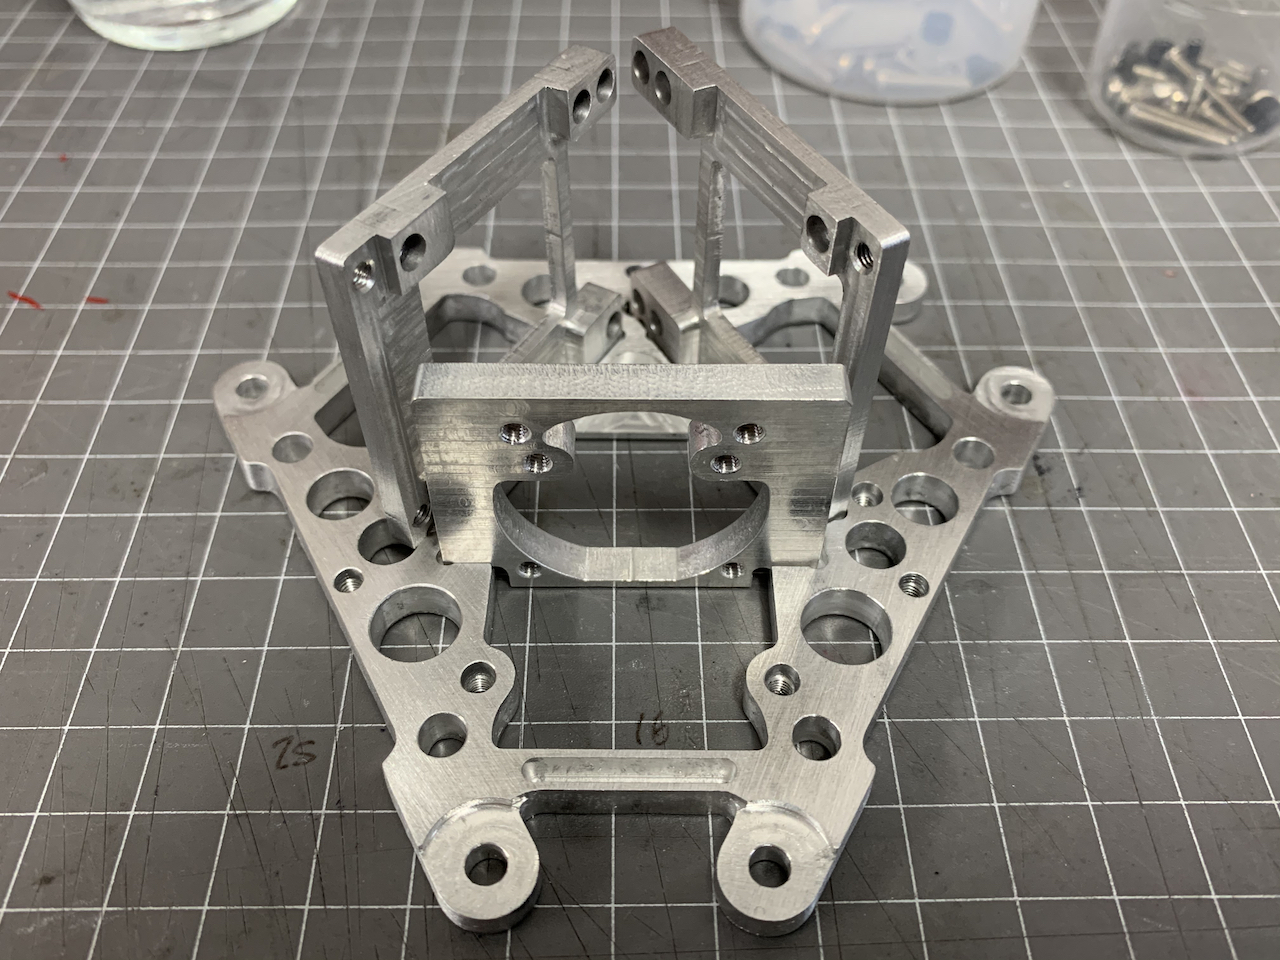
This Effector design provides for mounting a clone or genuine Mosquito Hot End onto a Predator Delta 3D Printer. It is designated as Version-9 not because there have been 8 other versions since the first Version 1 but more to reflect my own design file naming designation. This page is more to provide links to the relevant videos and downloads than an explanation of this version. The downloads will provide all that relevant information. This is the version I currently make for sale. Use the Contact Me form if you require pricing and details.

Please note that all the information and downloads provided on this page are intended for personal use only.
If you intend to use any of this information for commercial purposes please contact me for authority before doing so.
If you intend to use any of this information for commercial purposes please contact me for authority before doing so.
Page Created
Date: March 18, 2021
Date: March 18, 2021
DOWNLOADS
The Main Effector Assembly Image collection: Mosquito Effector Assembly-Images.zip
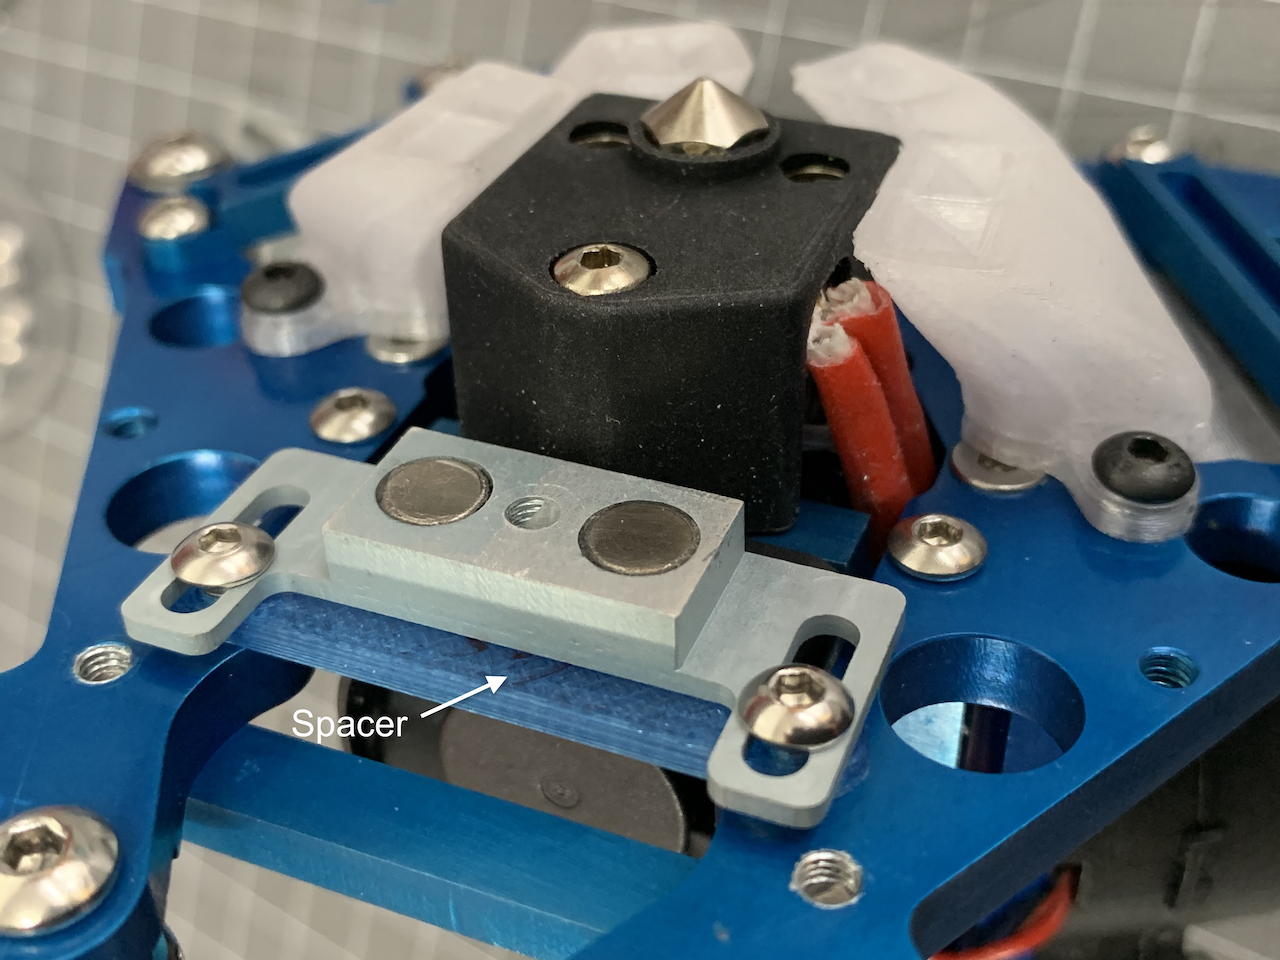
Level sensor magnetic holder spacers: Magnet Mounting Spacers.zip
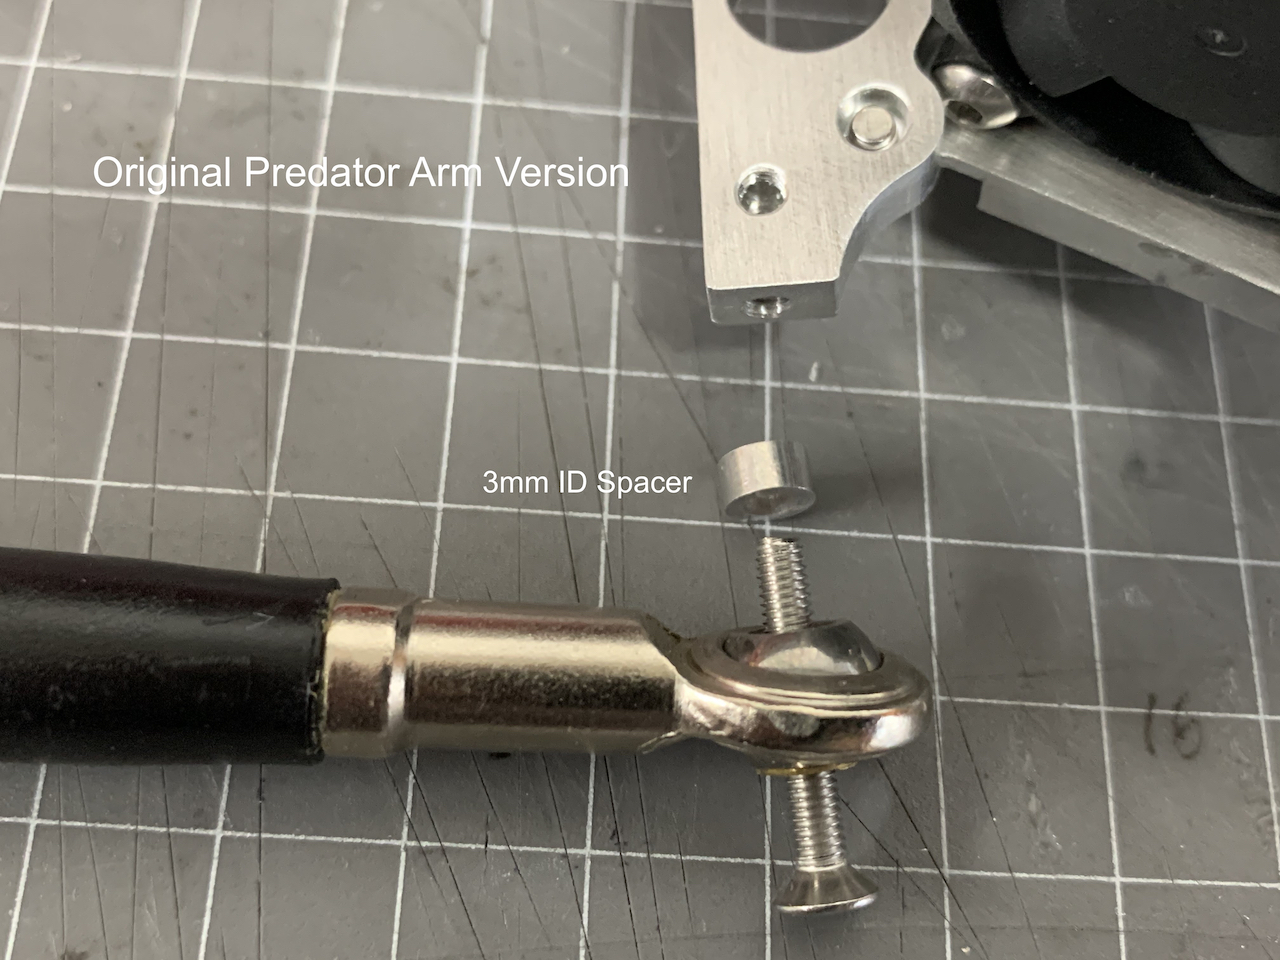
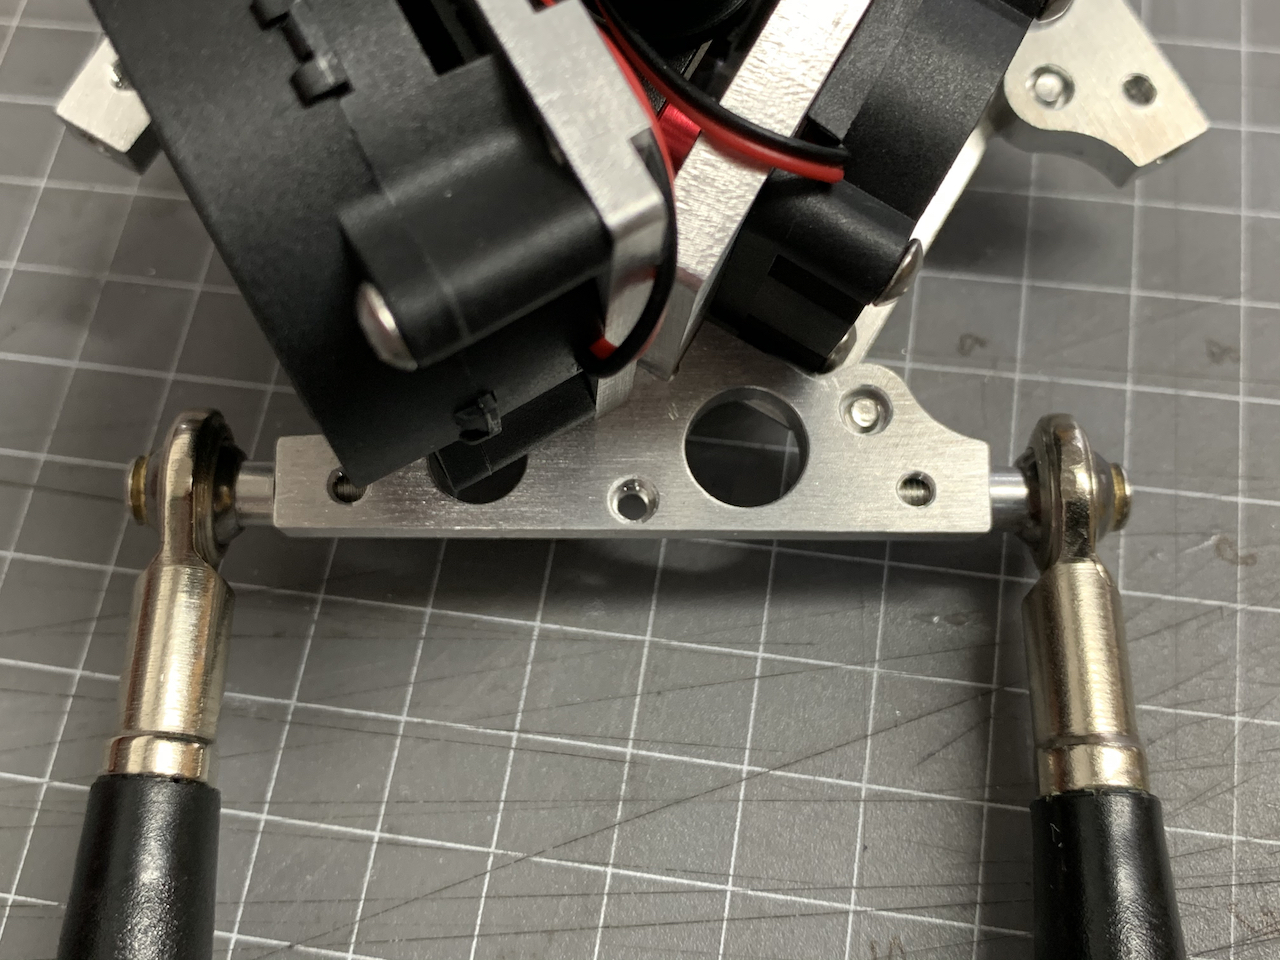
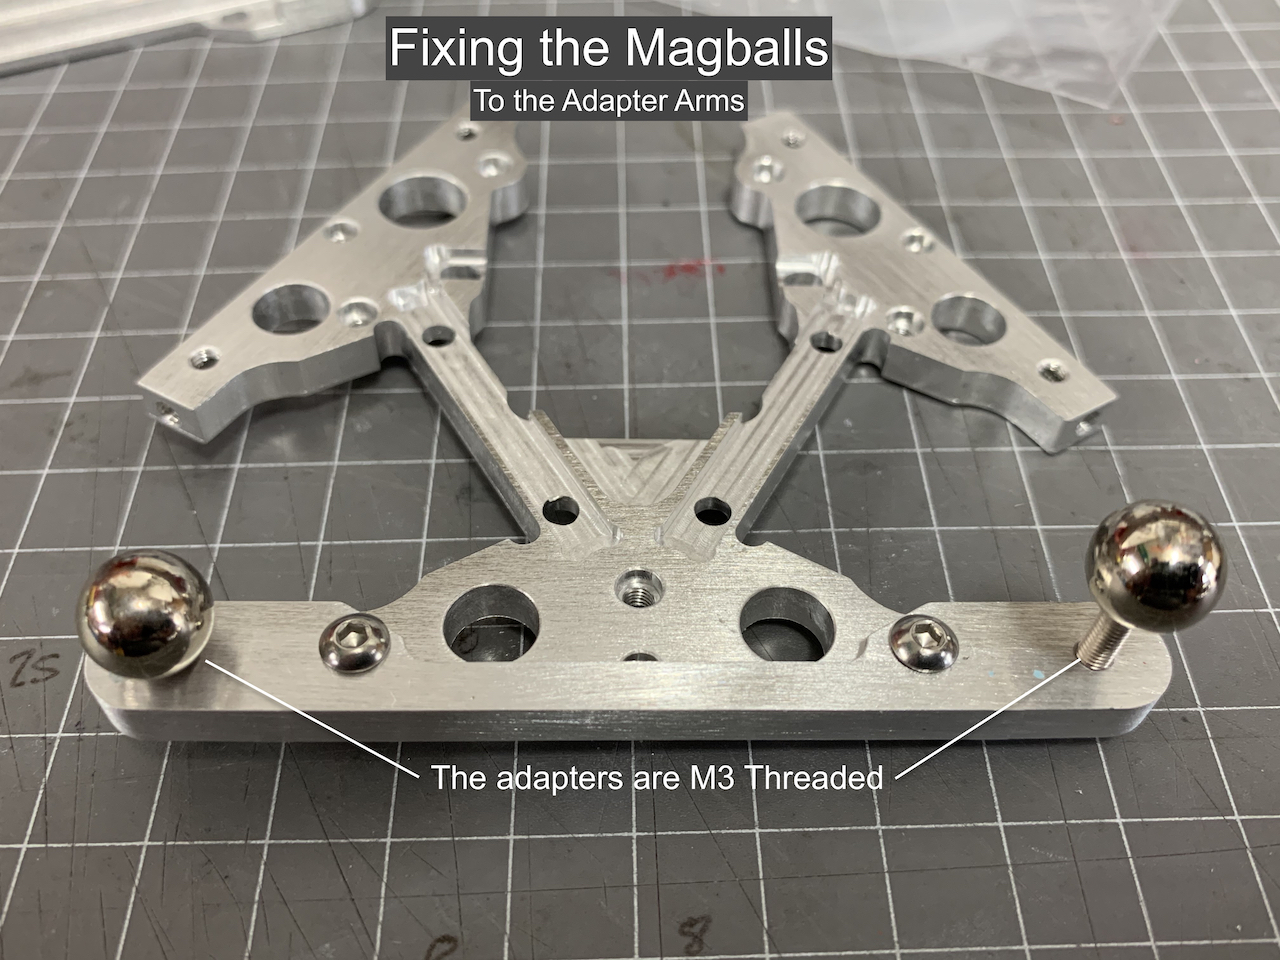
Images showing how to fit the Magball Adapters: Attaching Optional Magball Arms-Images.zip
Detailing a dimensional change preparing Part Cooling Ducts. Part Cooling Duct Printing-Images.zip
Files for to the Part Cooling duct that I use: Part Cooling Fan Duct.zip
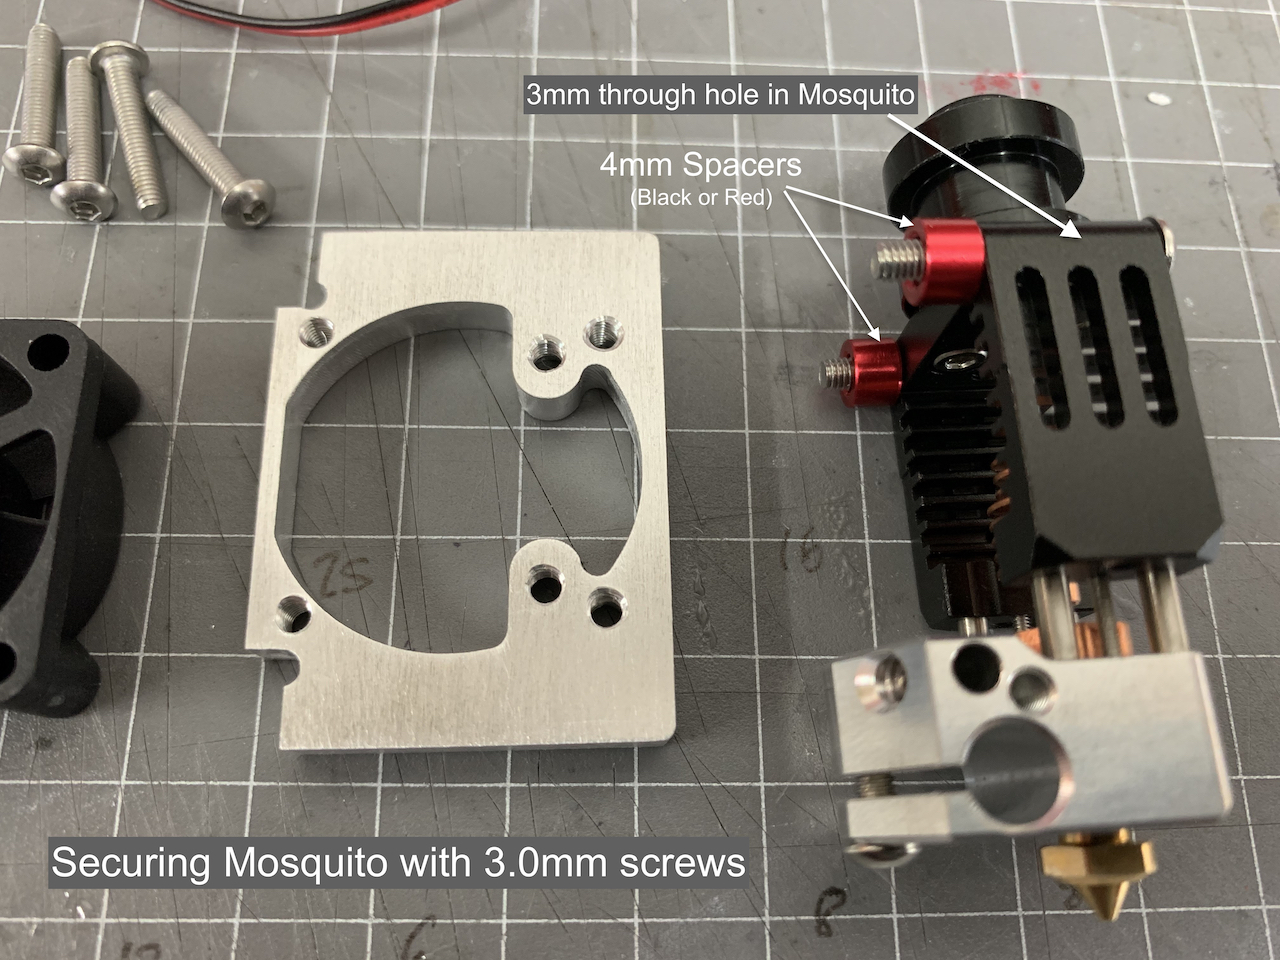
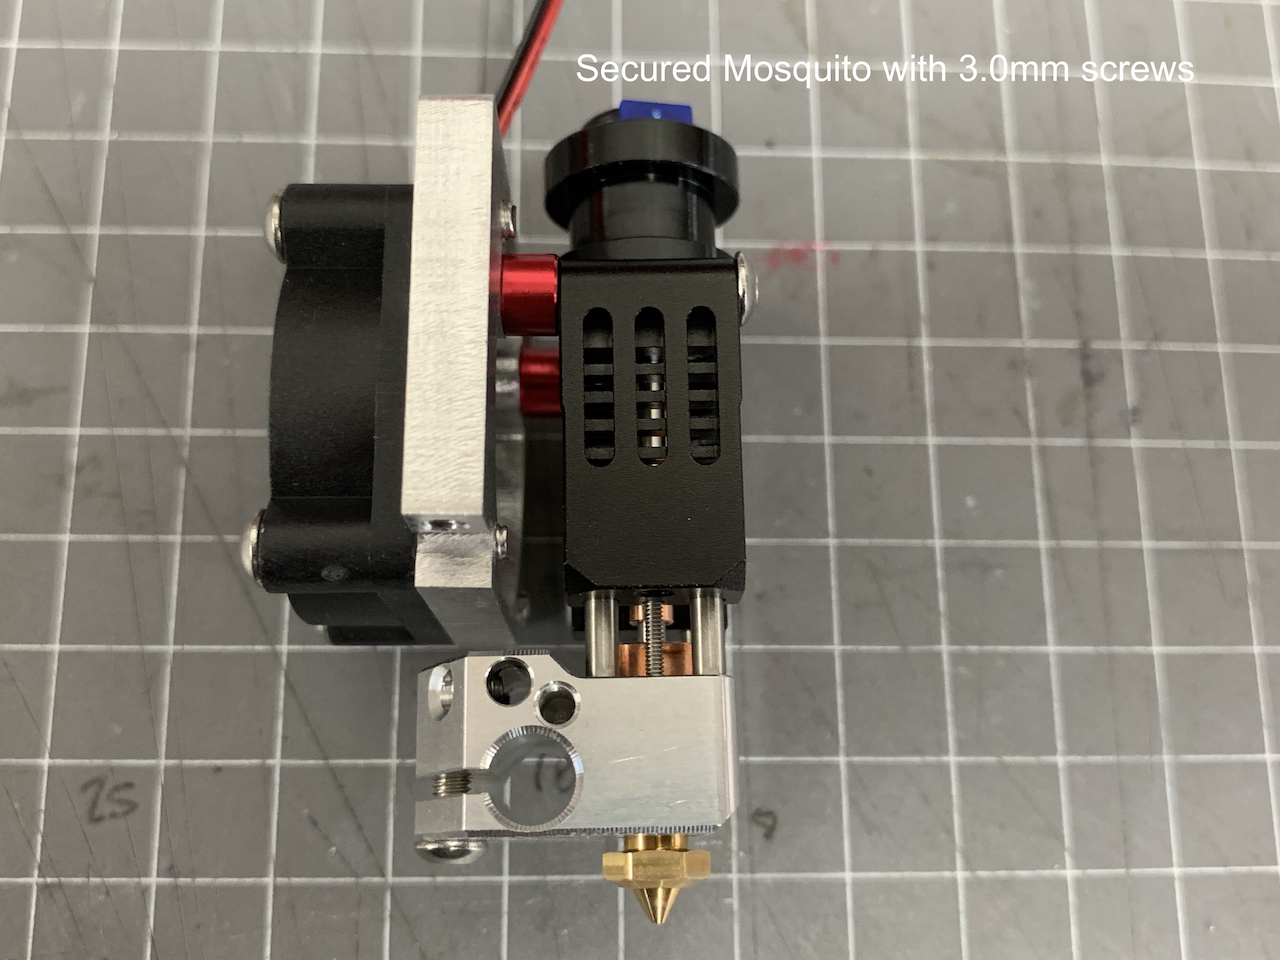
Two (2) Videos relating to fitting the Mosquito variations depending on screw size type m3 or M2.5
Mounting Mosquito with 3.0mm Screws.mp4 (File is a .zip)
Mounting Mosquito with 2.5mm Screws.mp4 (File is a .zip)
Video Attaching Level Magnetic Holder with Spacers: "Level Sensor Attachment Fitting.mp4" (File is a .zip)
Version-9 Clone Mosquito Effector
The full assembly Video
Click to play
Click to play
This is just a random example selection from the total of 62 stills contained within the download.

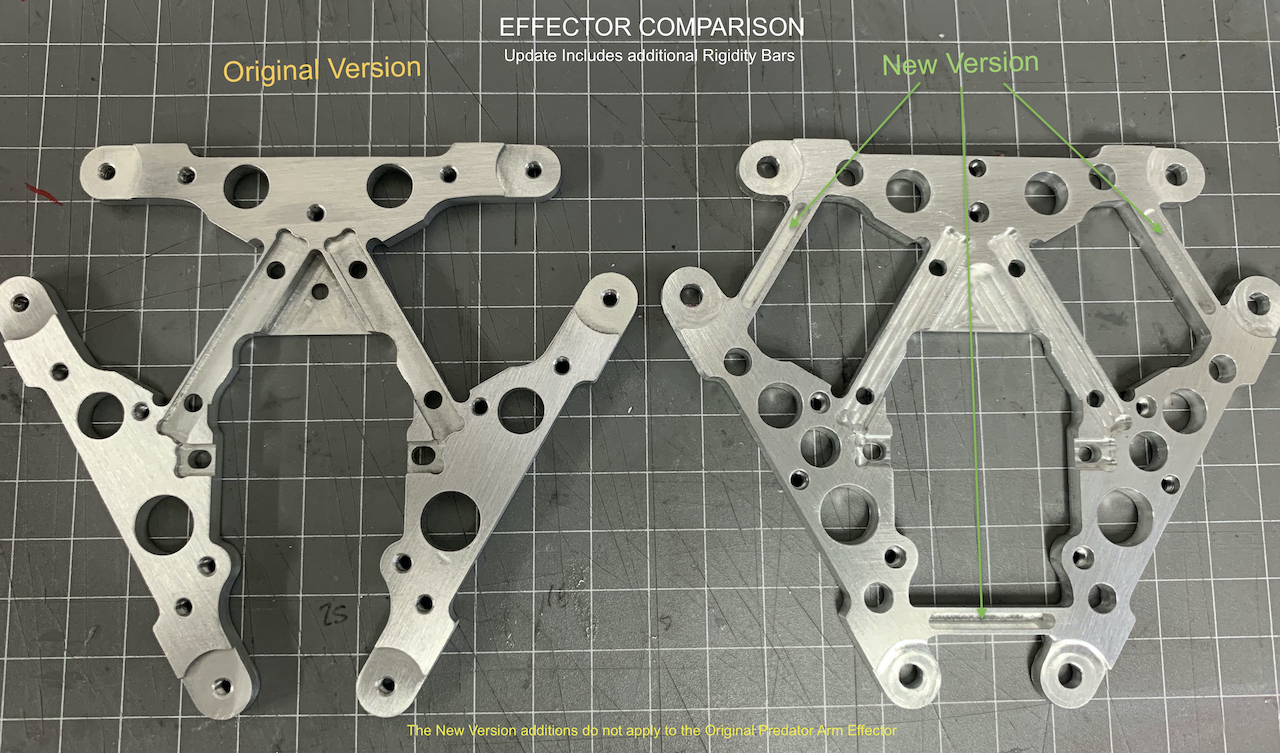
This video is an update to the previous one I posted back in November 2020. Since that video my effector design has been further refined and improved.
In this video I detail some of these updates and provide complete assembly instructions.
The main purpose for this video is that since posting the first video I have received many request from people wanting to purchase one of these effectors. As such I decide for a limited time to make some for sale and that I am currently doing on request.
I make two versions, one exclusively for MagBall Arms and the other to take the original Predator Arms that can optionally be fitted with a MagBall arm adapter.
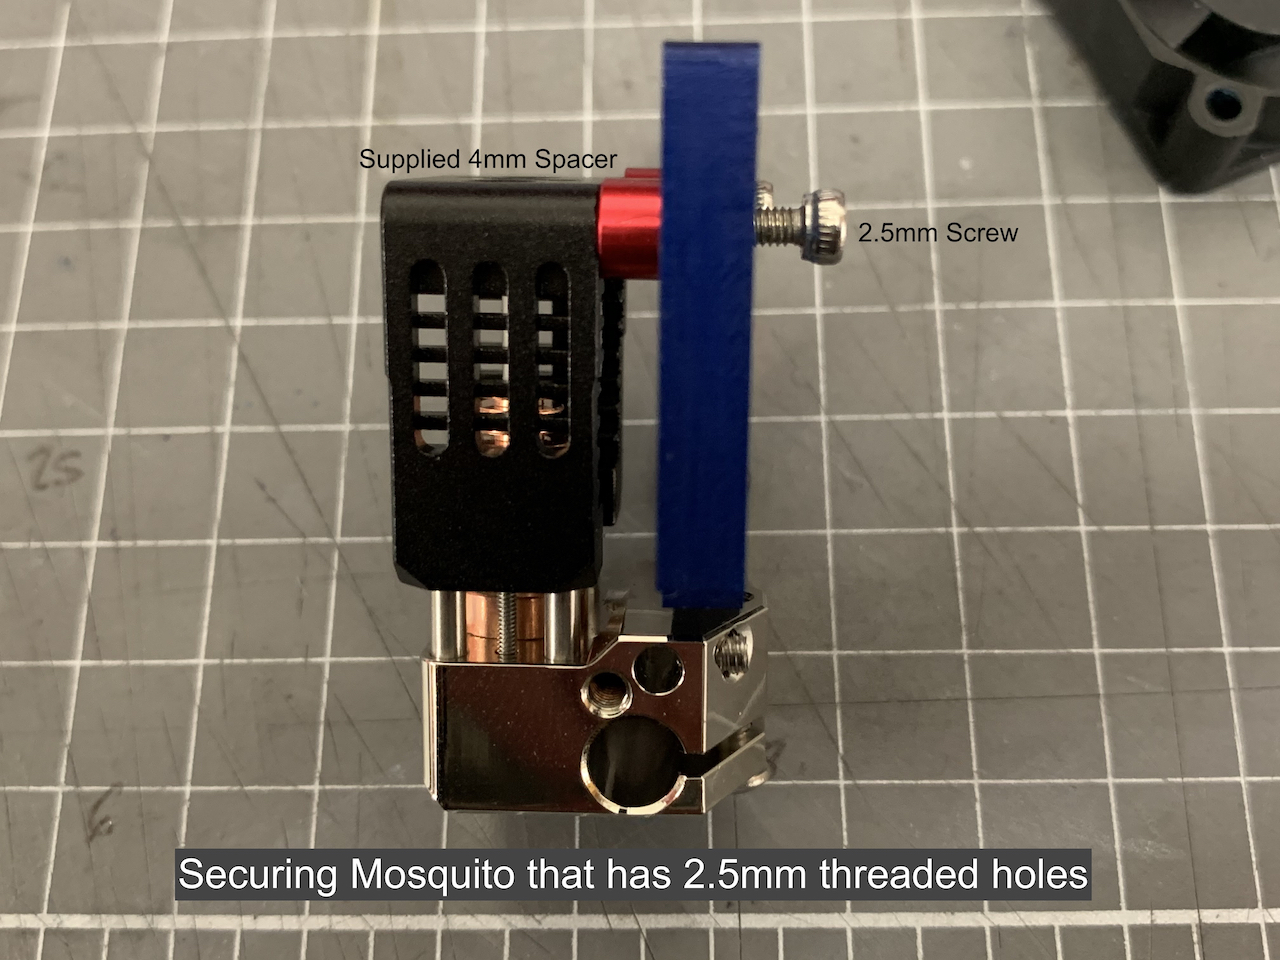
Note that some, clone Mosquitos have threaded M2.5 mounting holes. The M2.5 screws you will receive with that Mosquito can be used to fit that Mosquito to the mount. Download and view the file Mounting Mosquito with 2.5mm Screws.mp4 (File is a .zip)
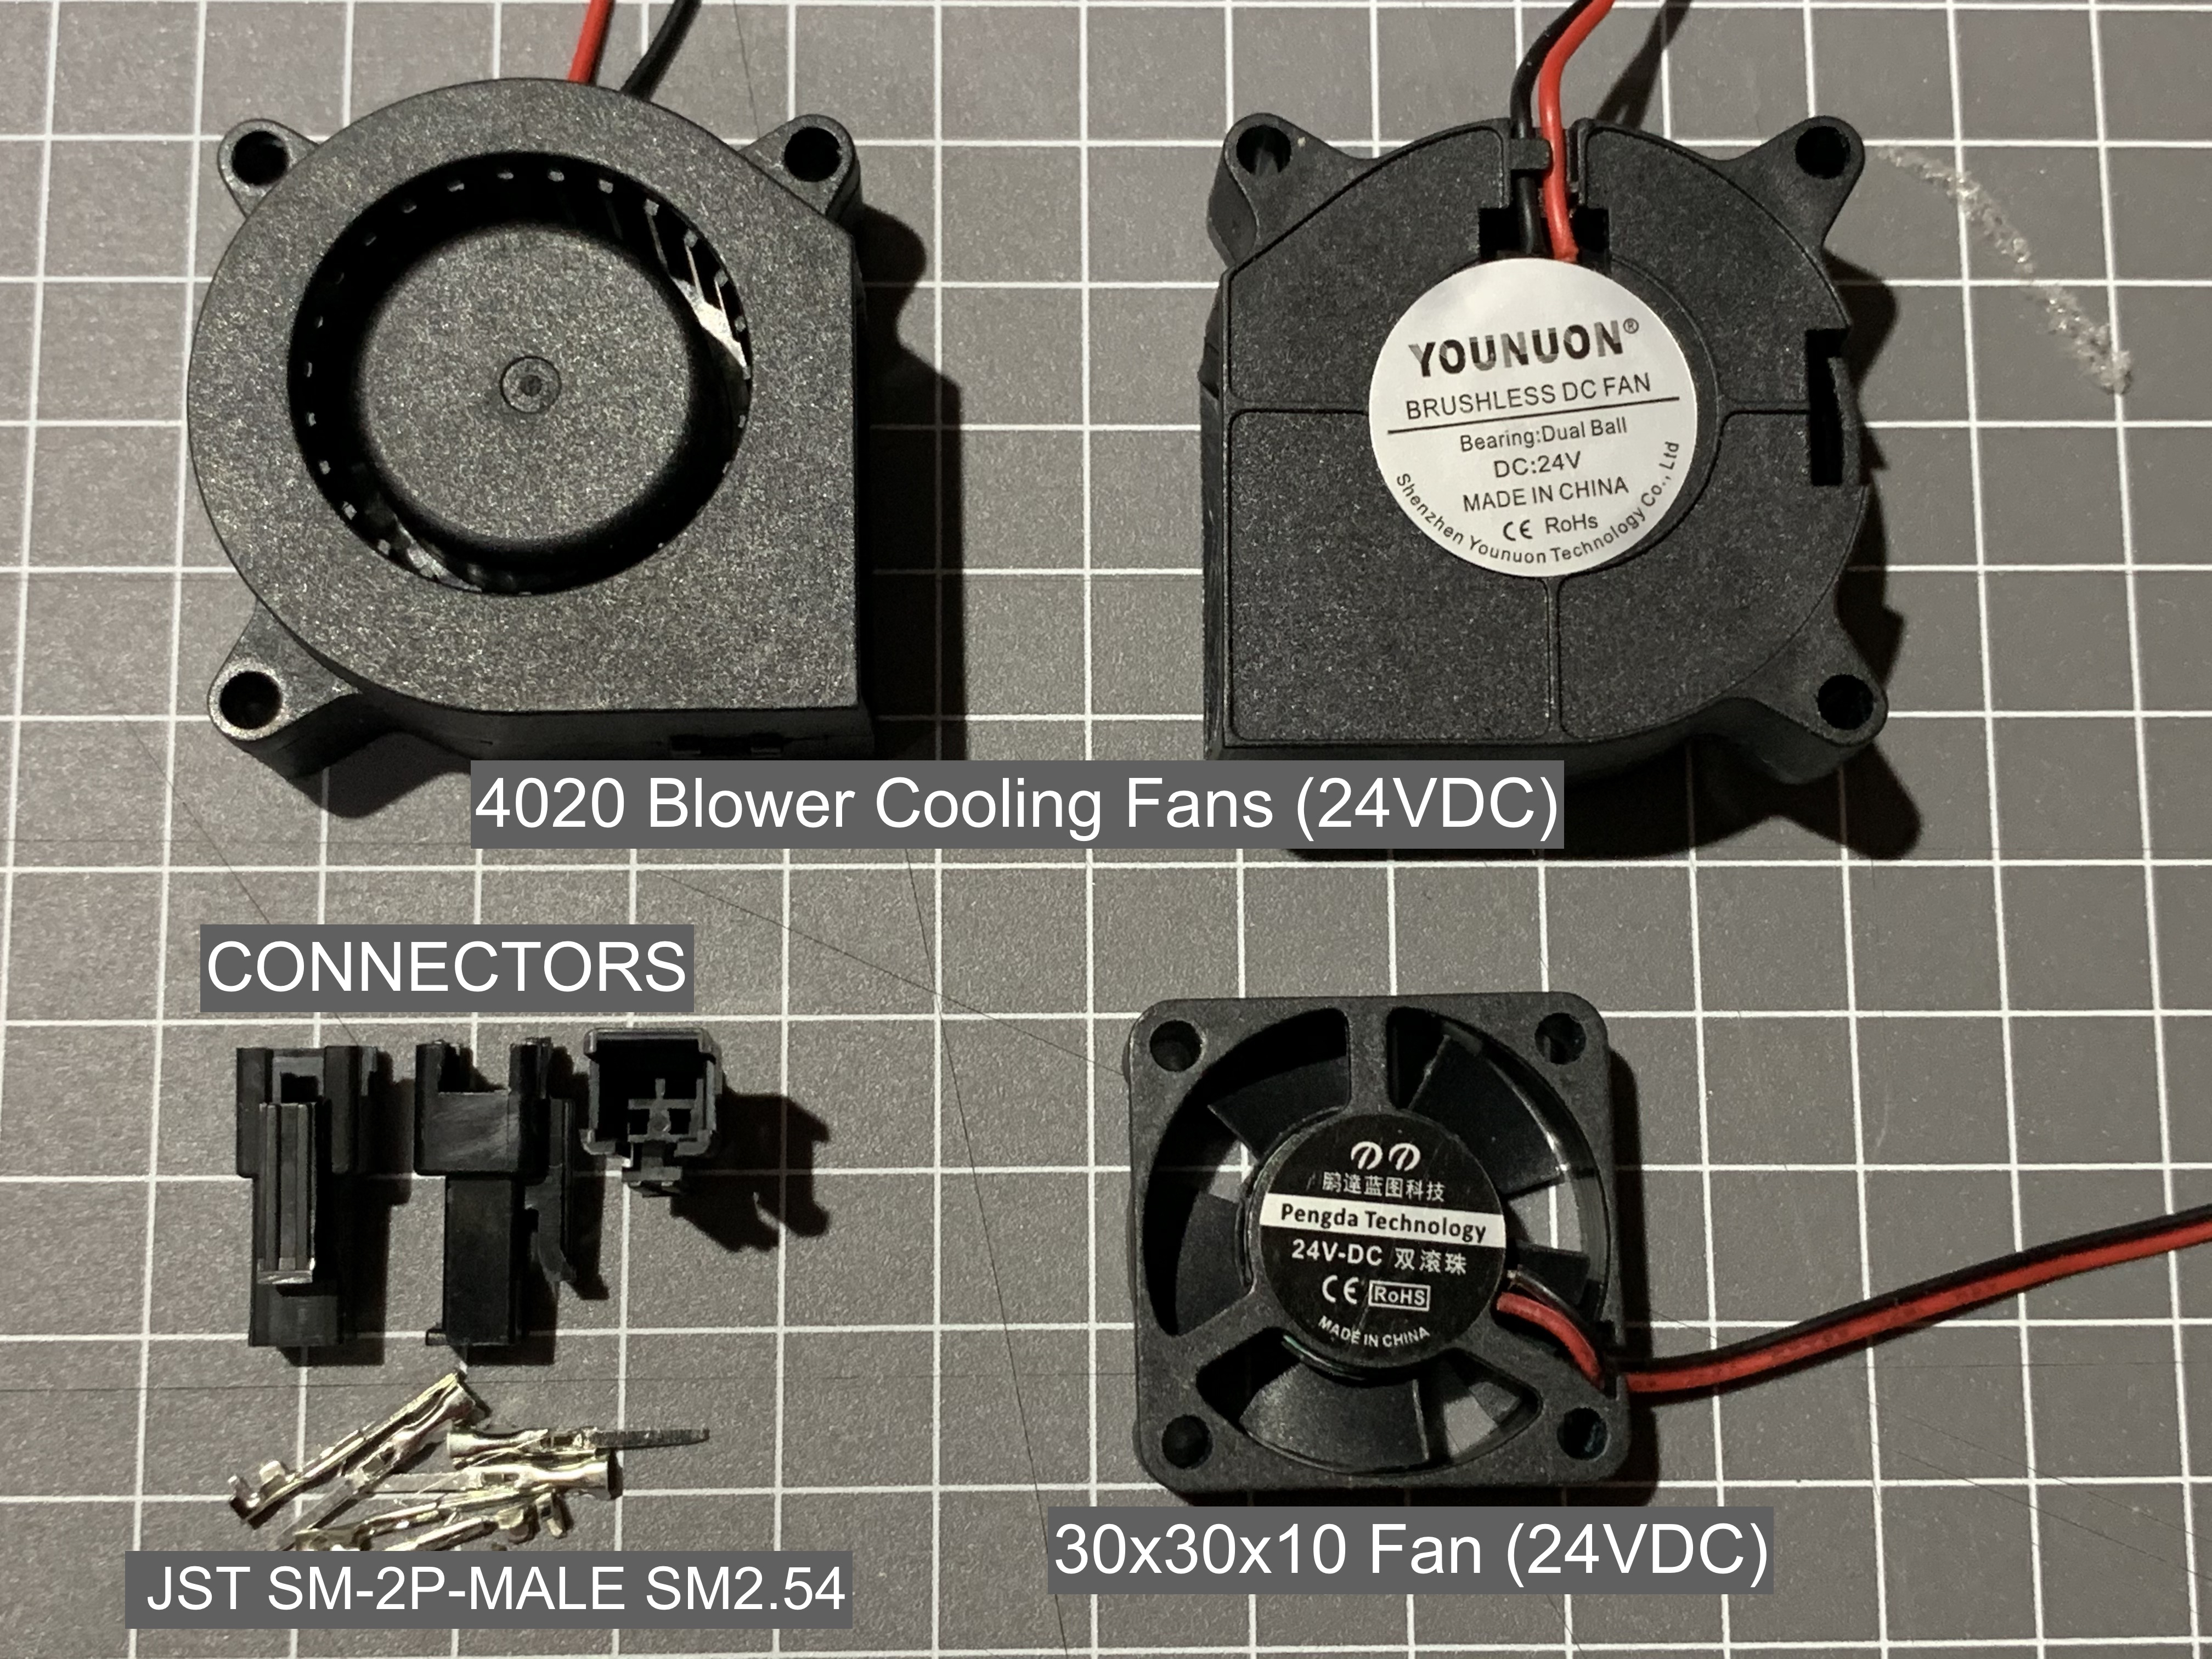
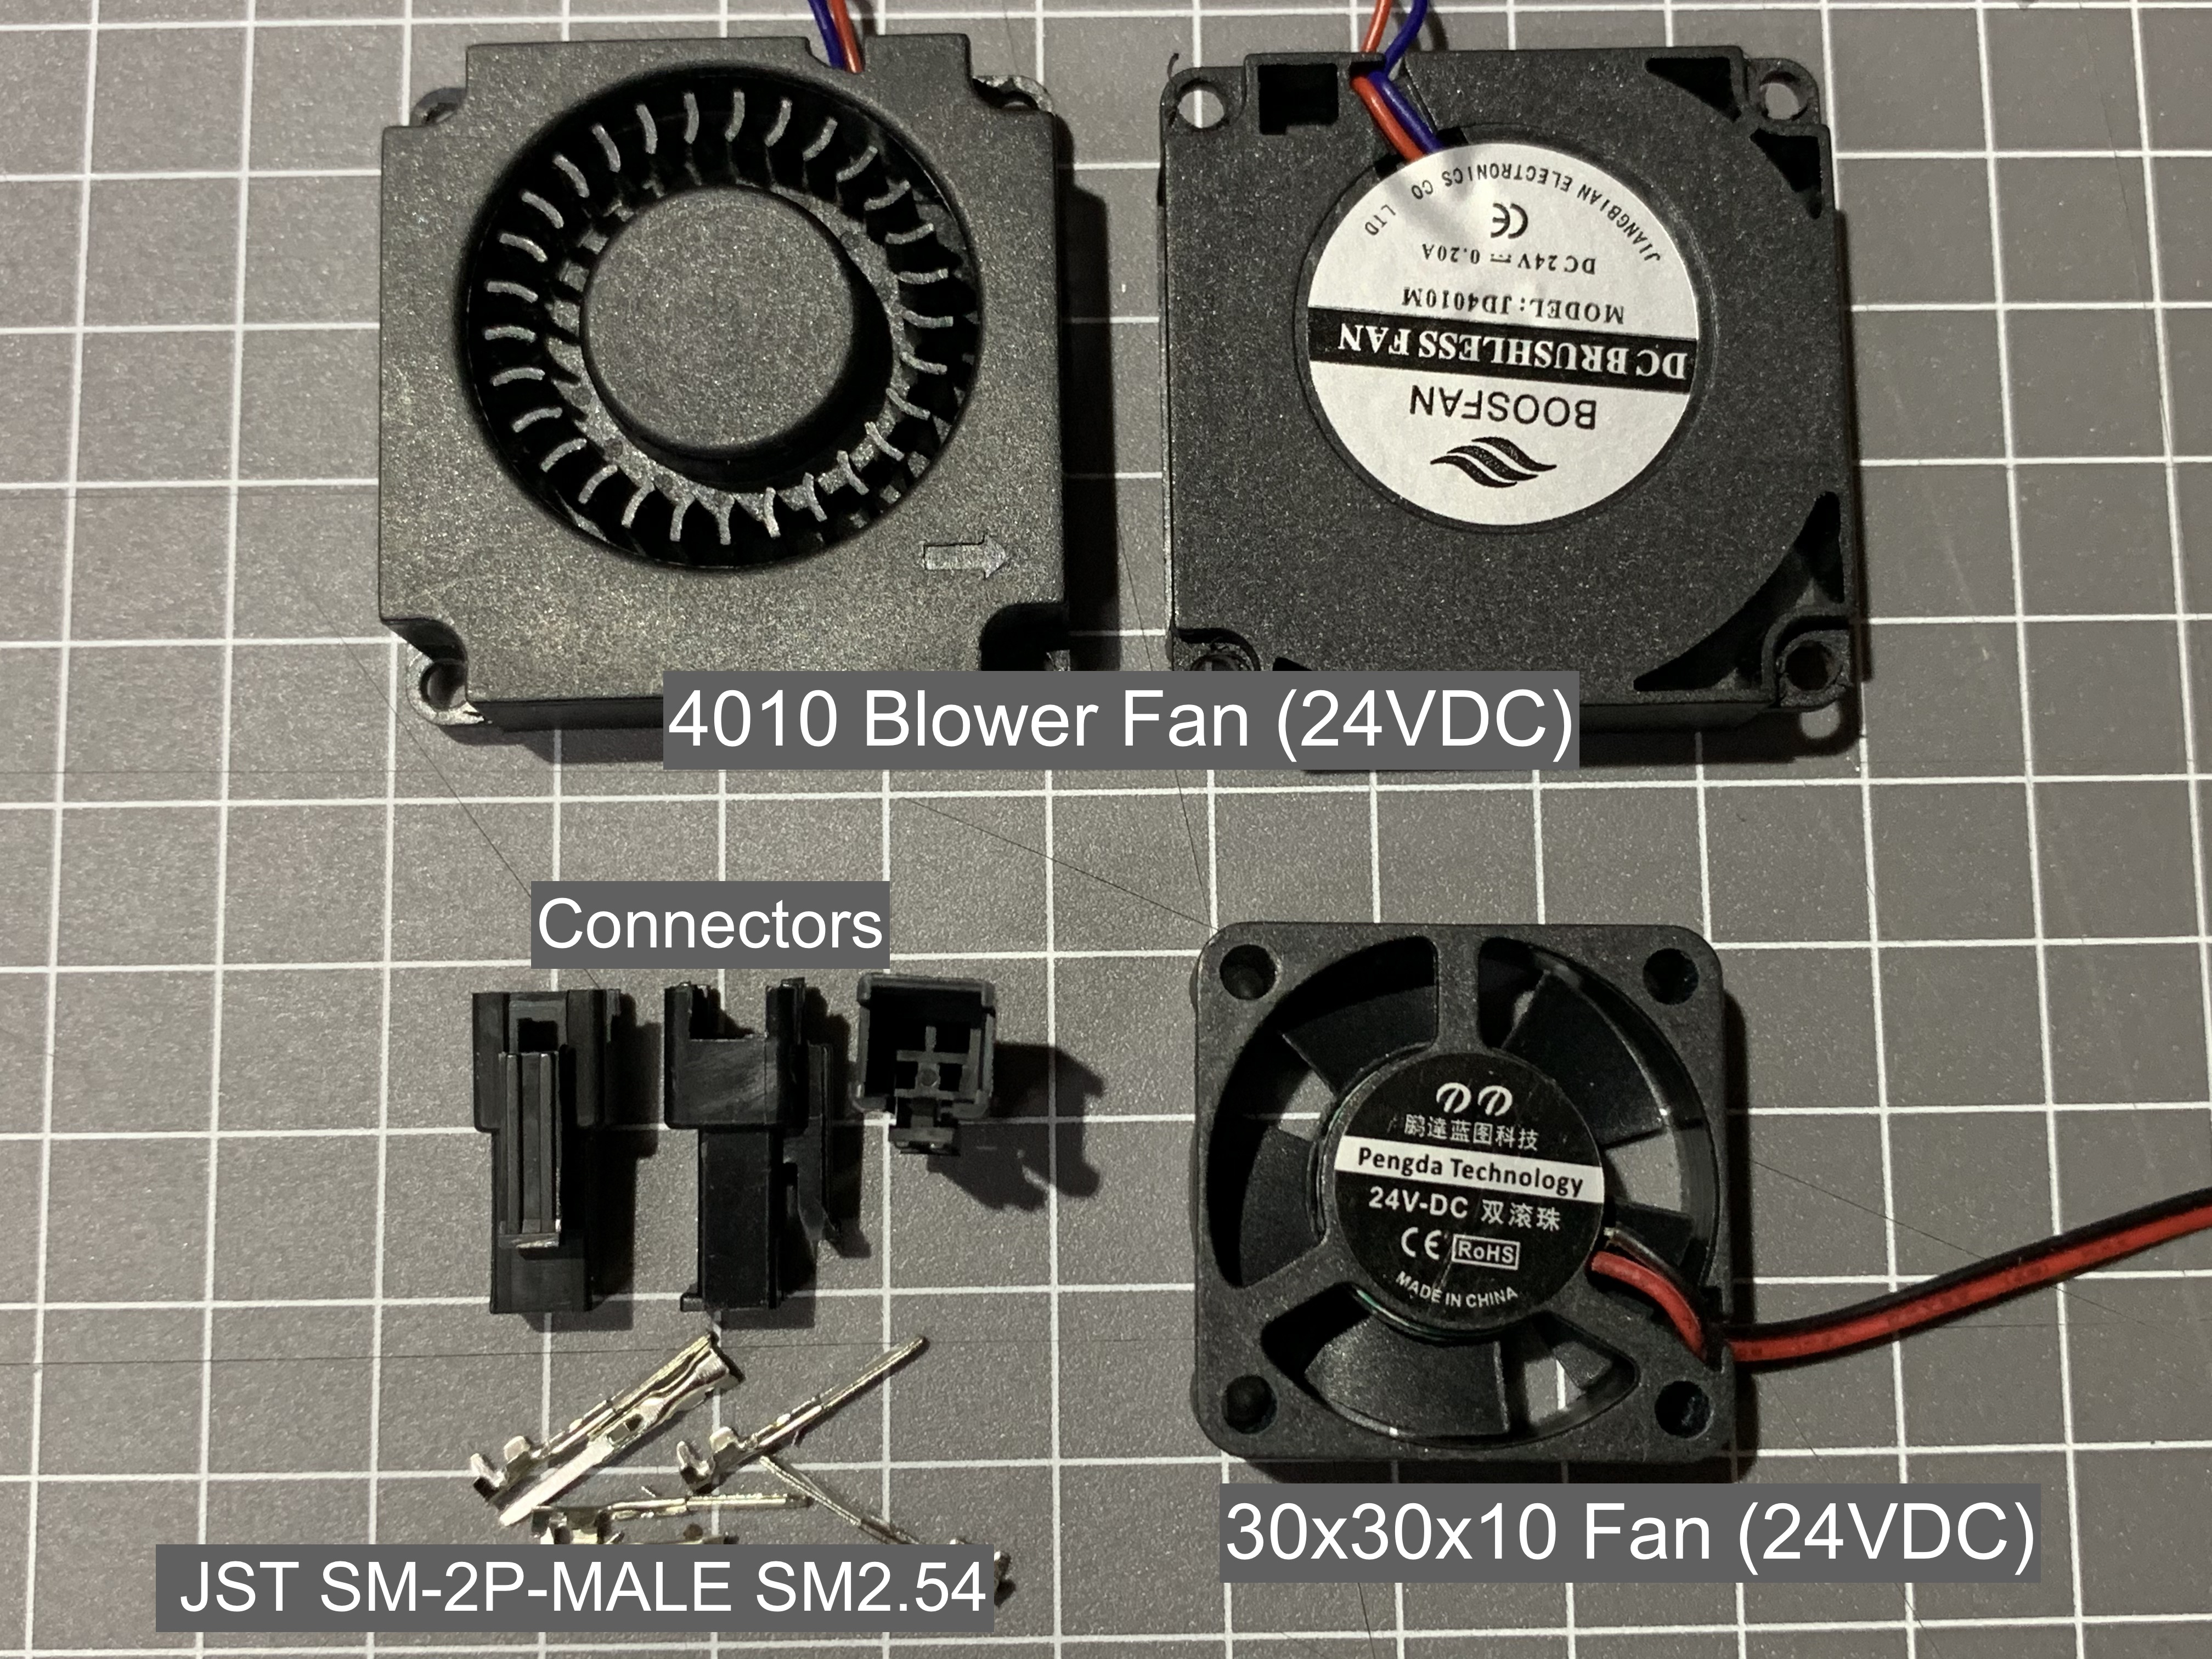

FANS and CONNECTORS
RECOMMENDED
OPTIONAL (Use Original Cooling Fans)
Connectors for Fans
Updated: 13/9/2021
I may discontinue making these effectors for sale at any time without notice.
There are no .stl 3D Printable files for download as my effectors are designed primarily to be CNC machined from aluminium.
Where possible all required assembly screws and spacers are included with the kit.
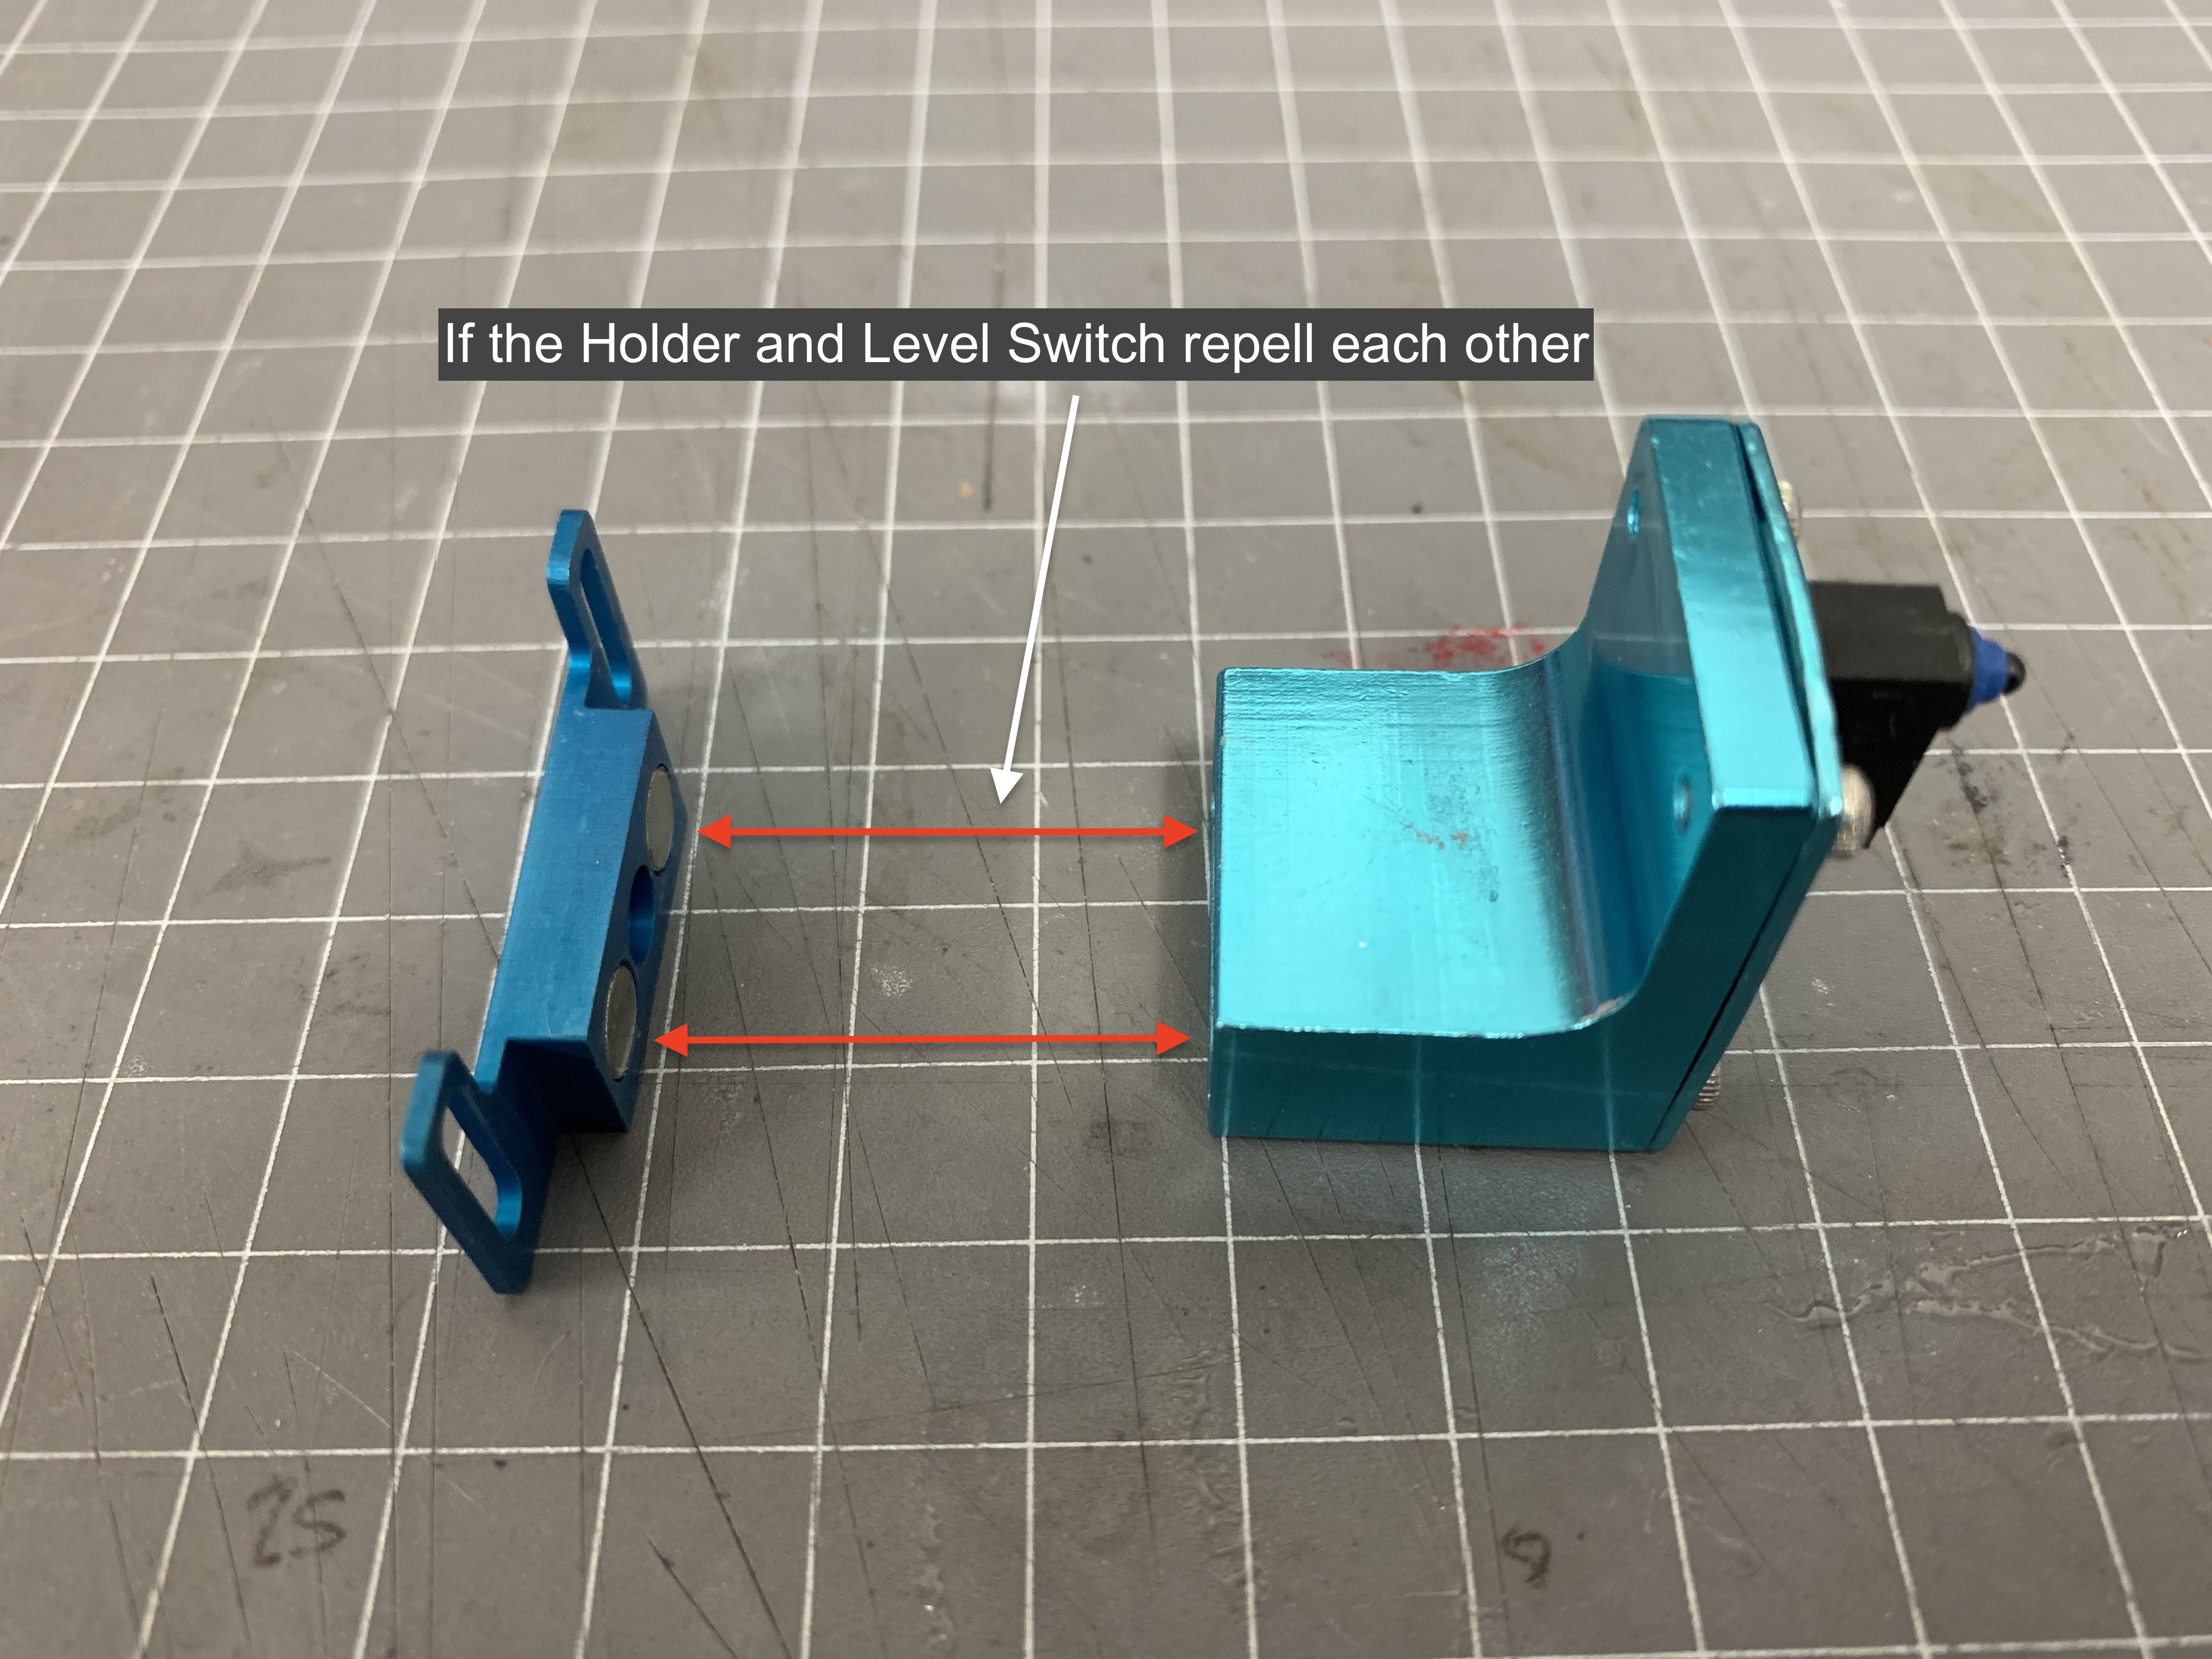
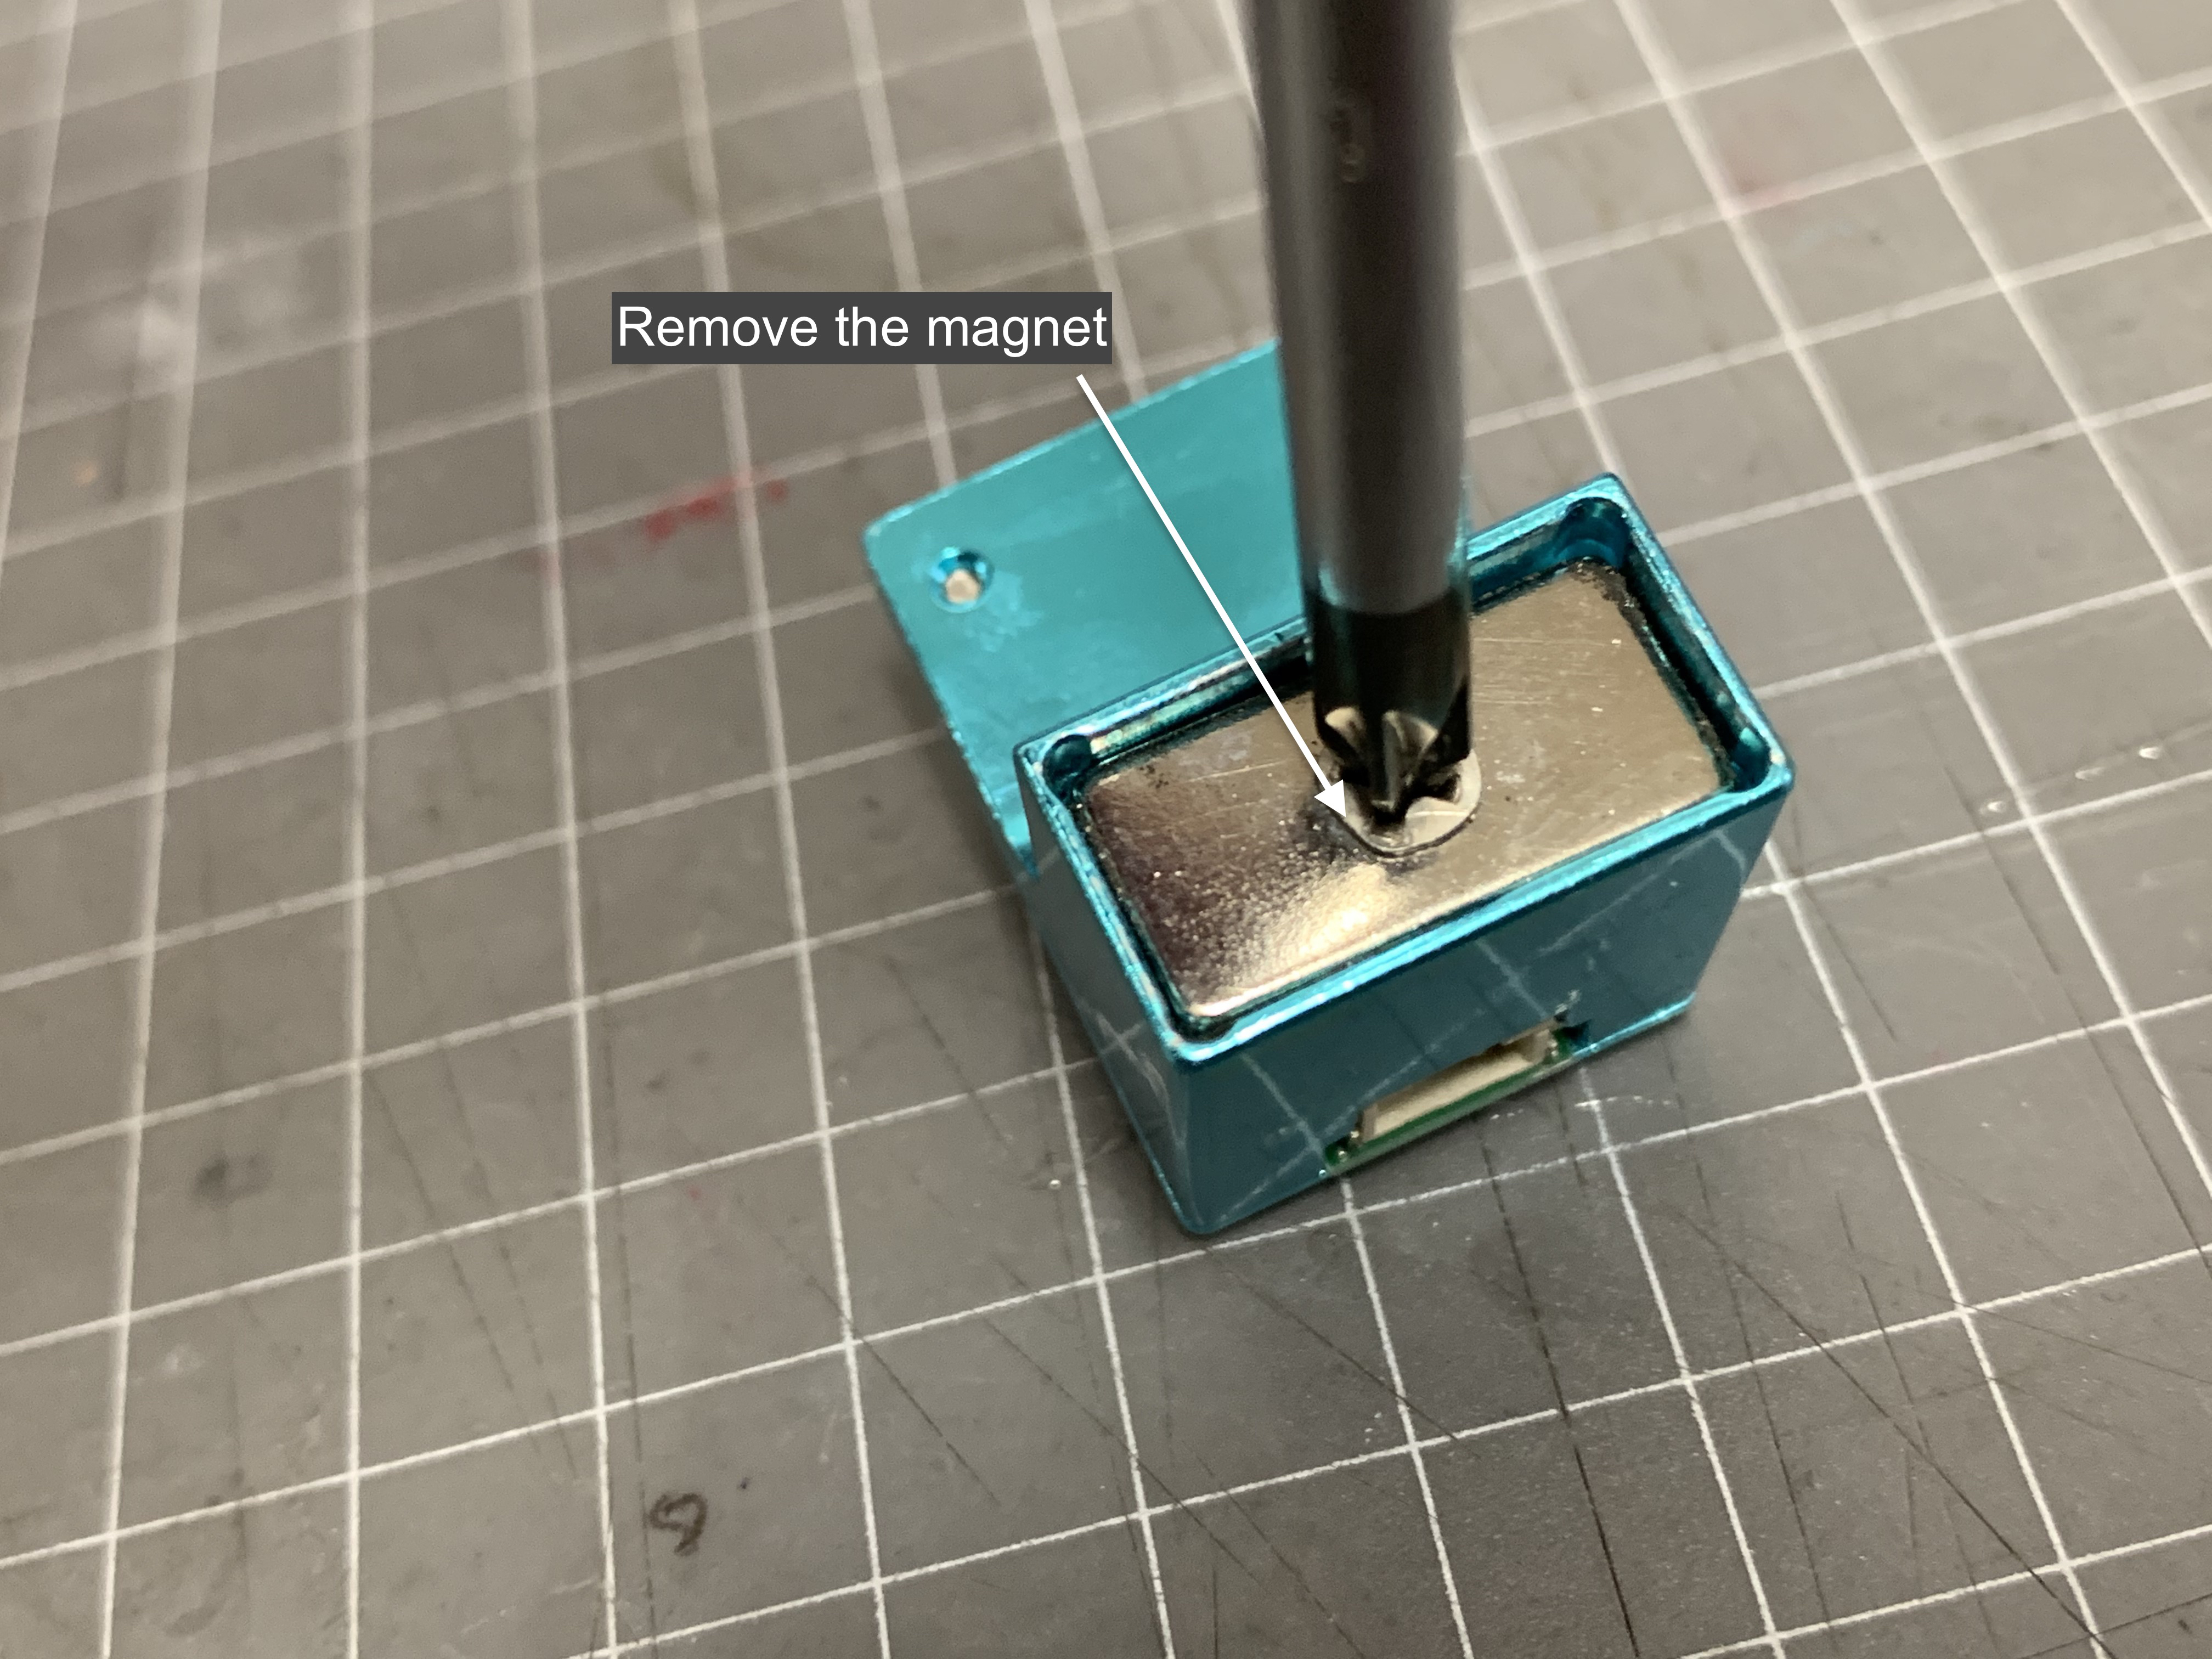
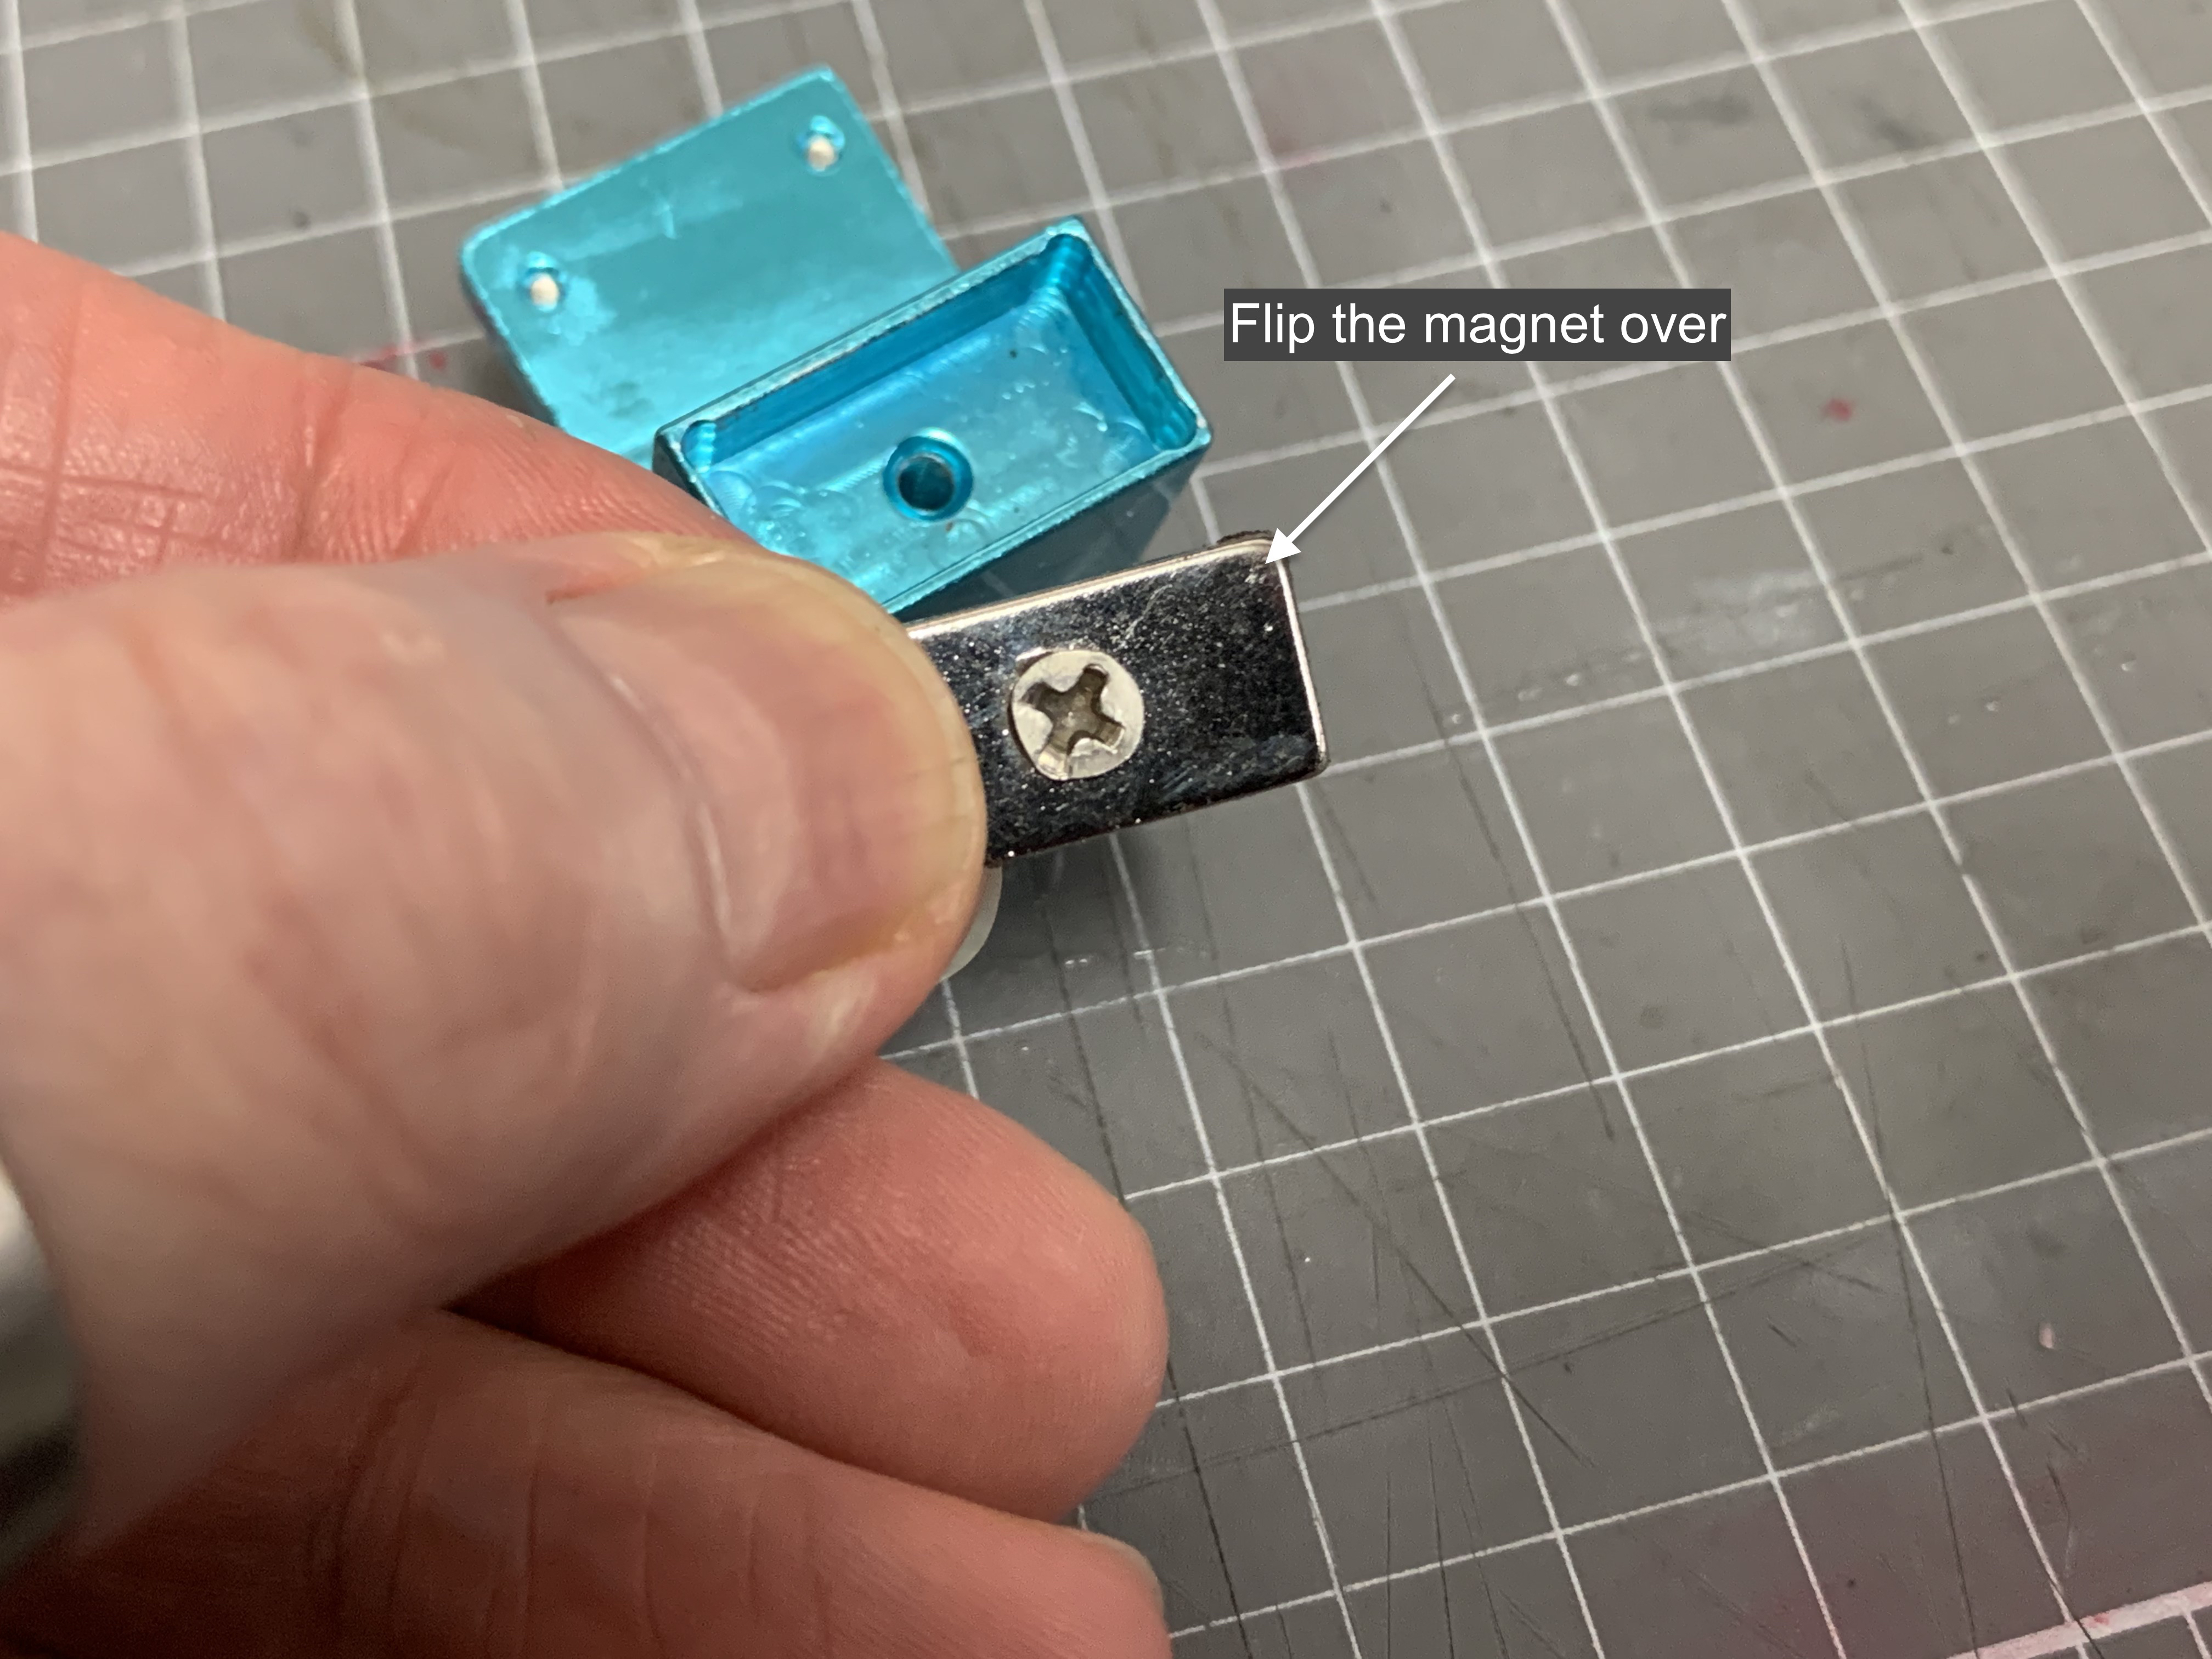
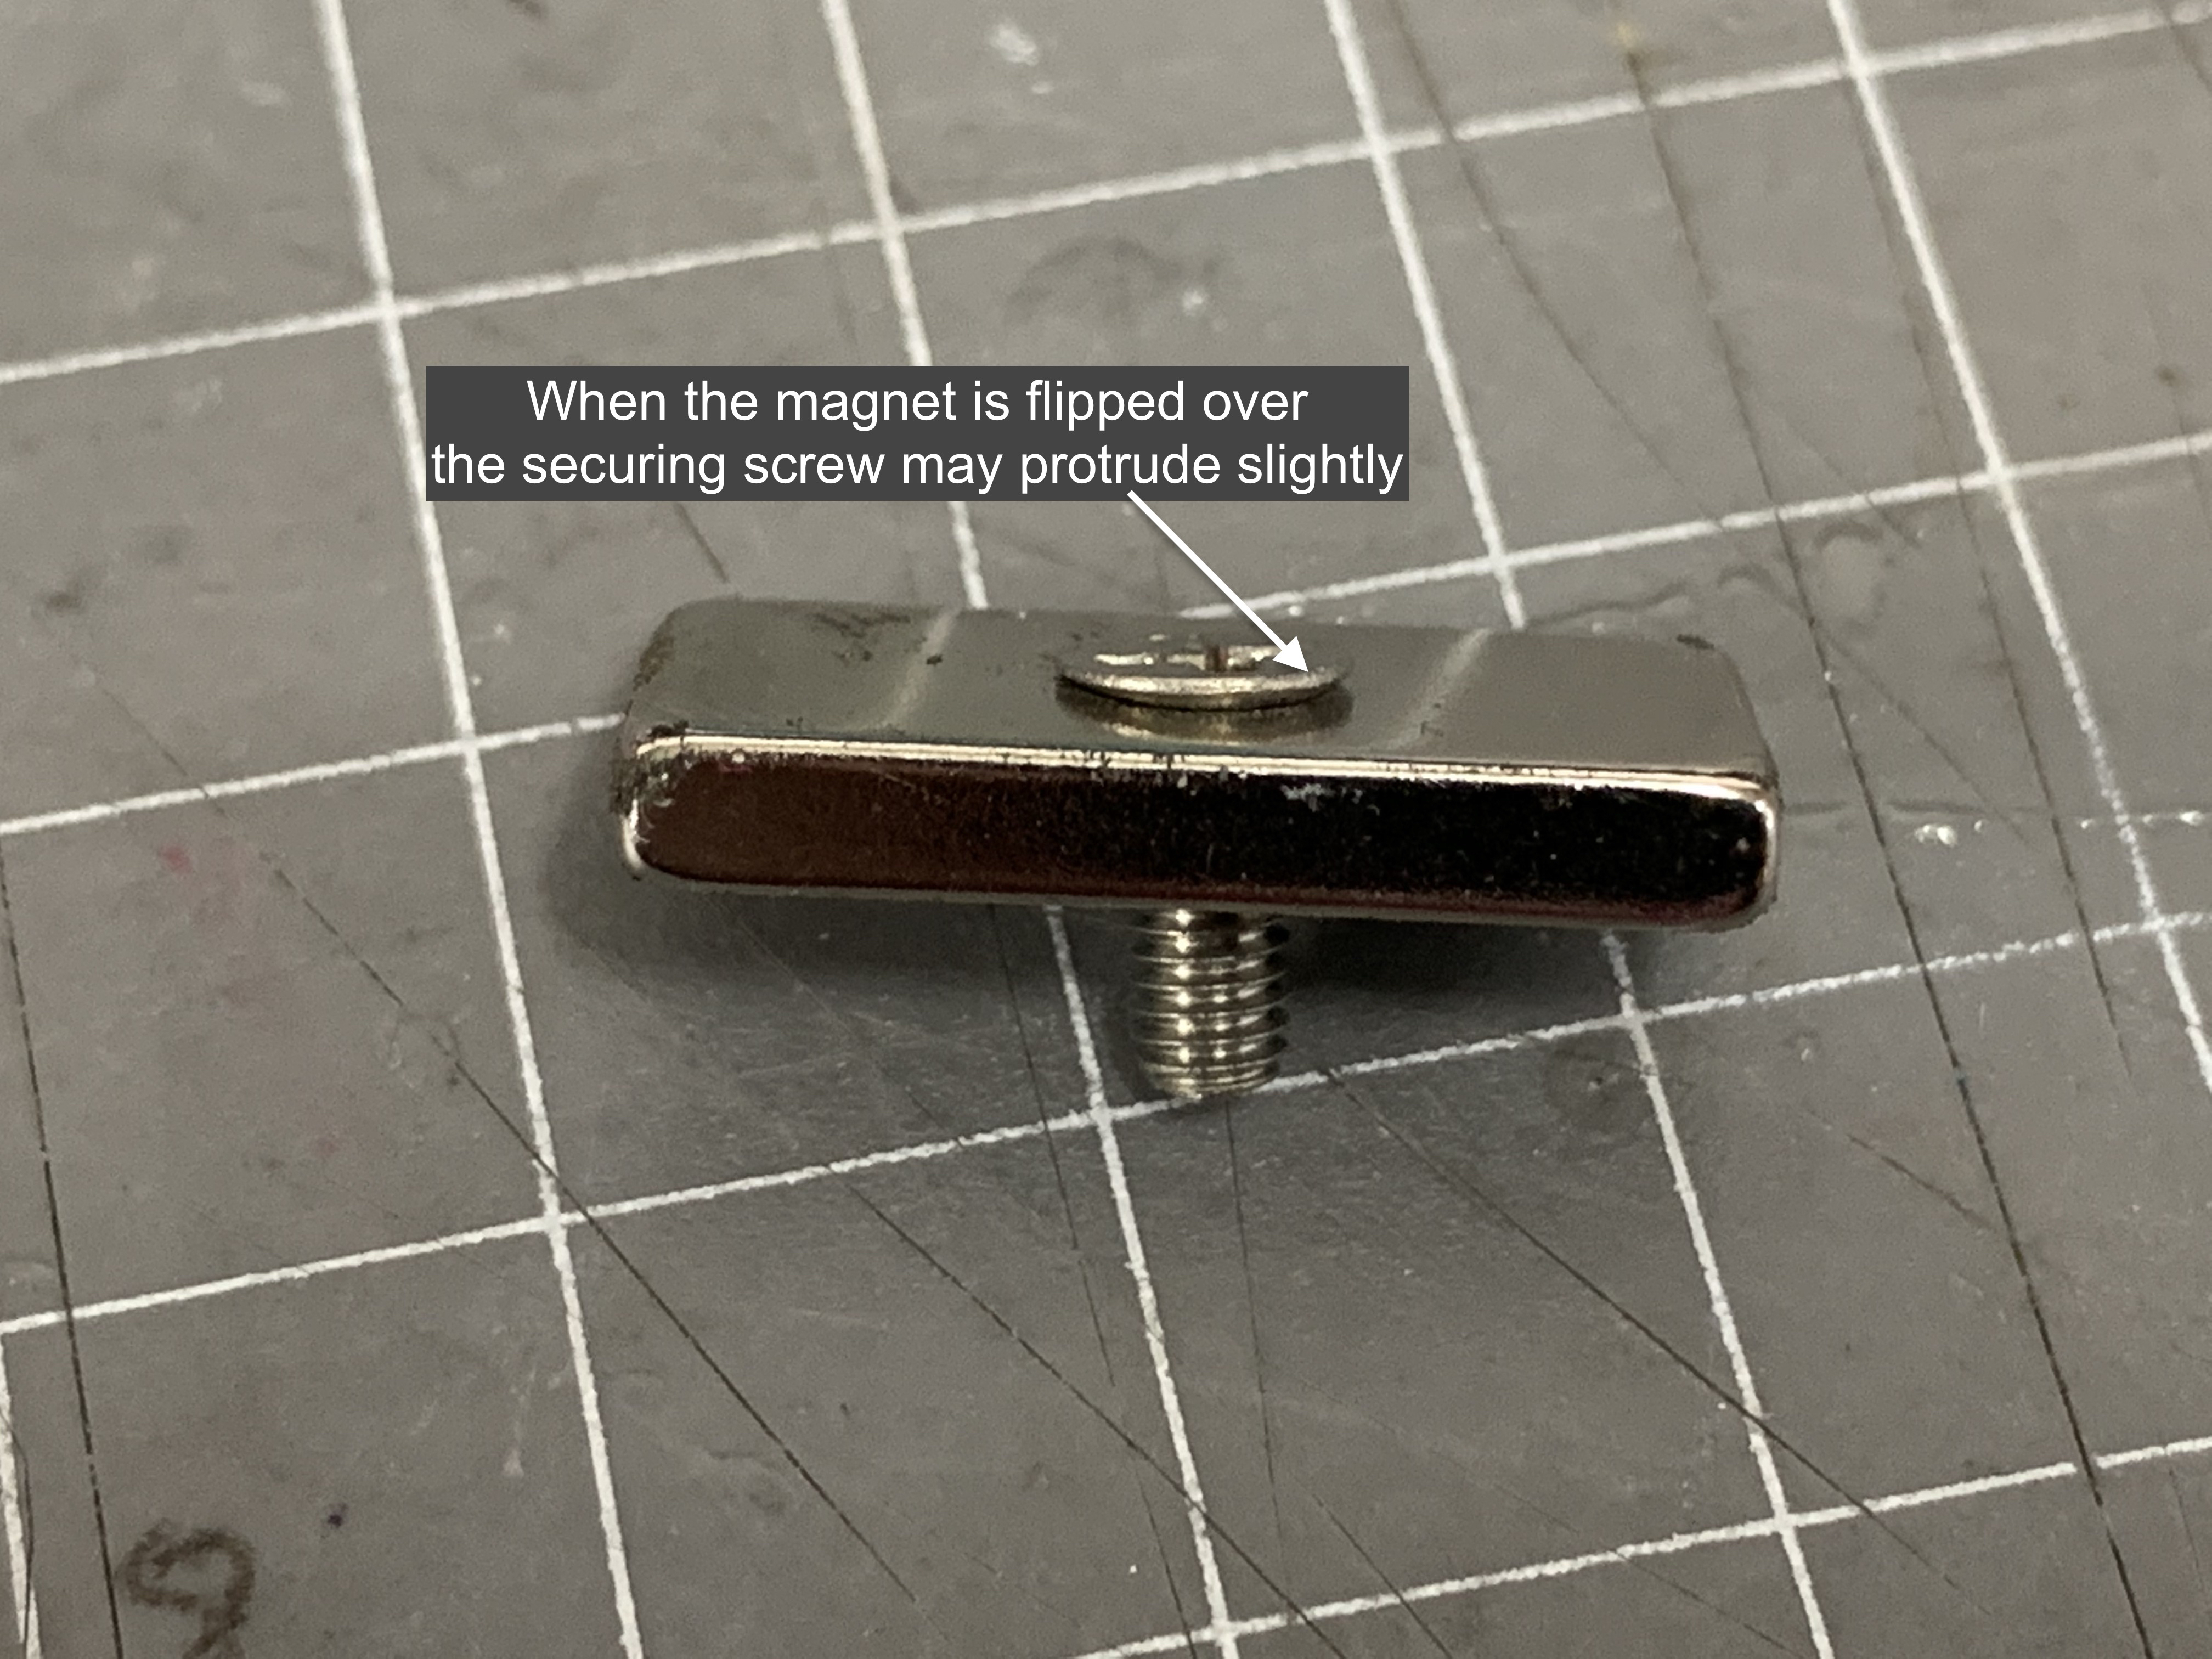
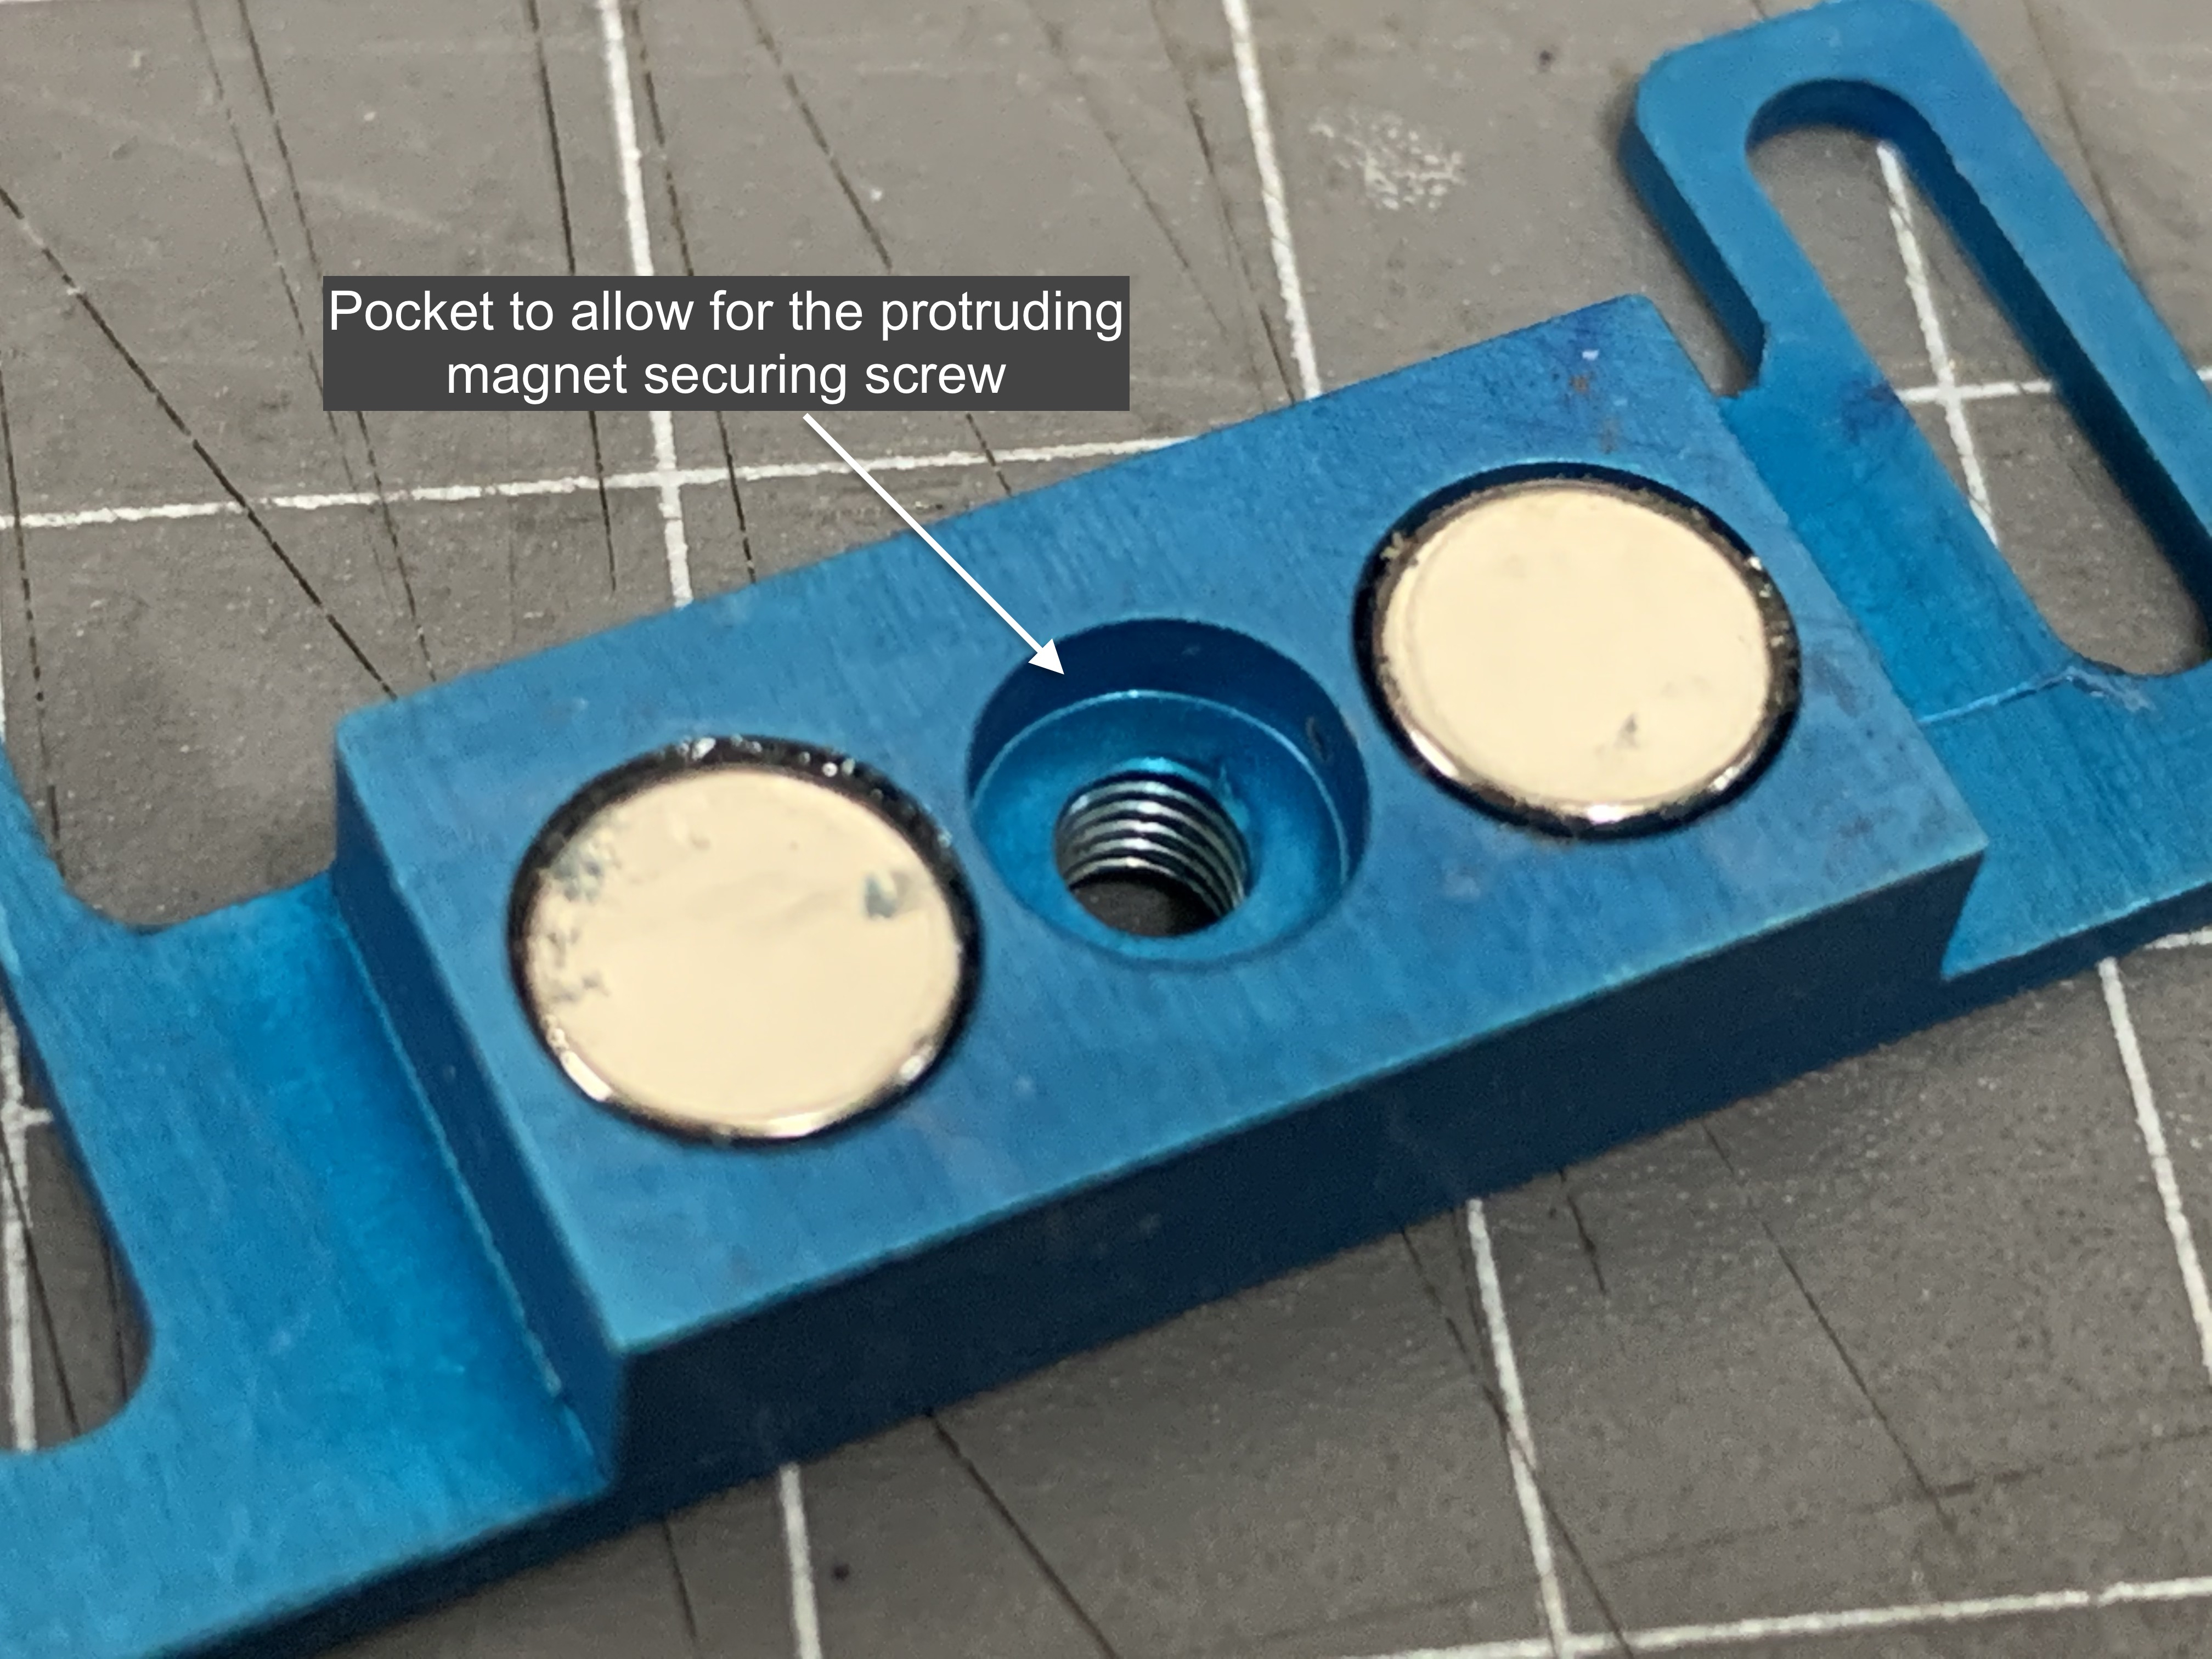
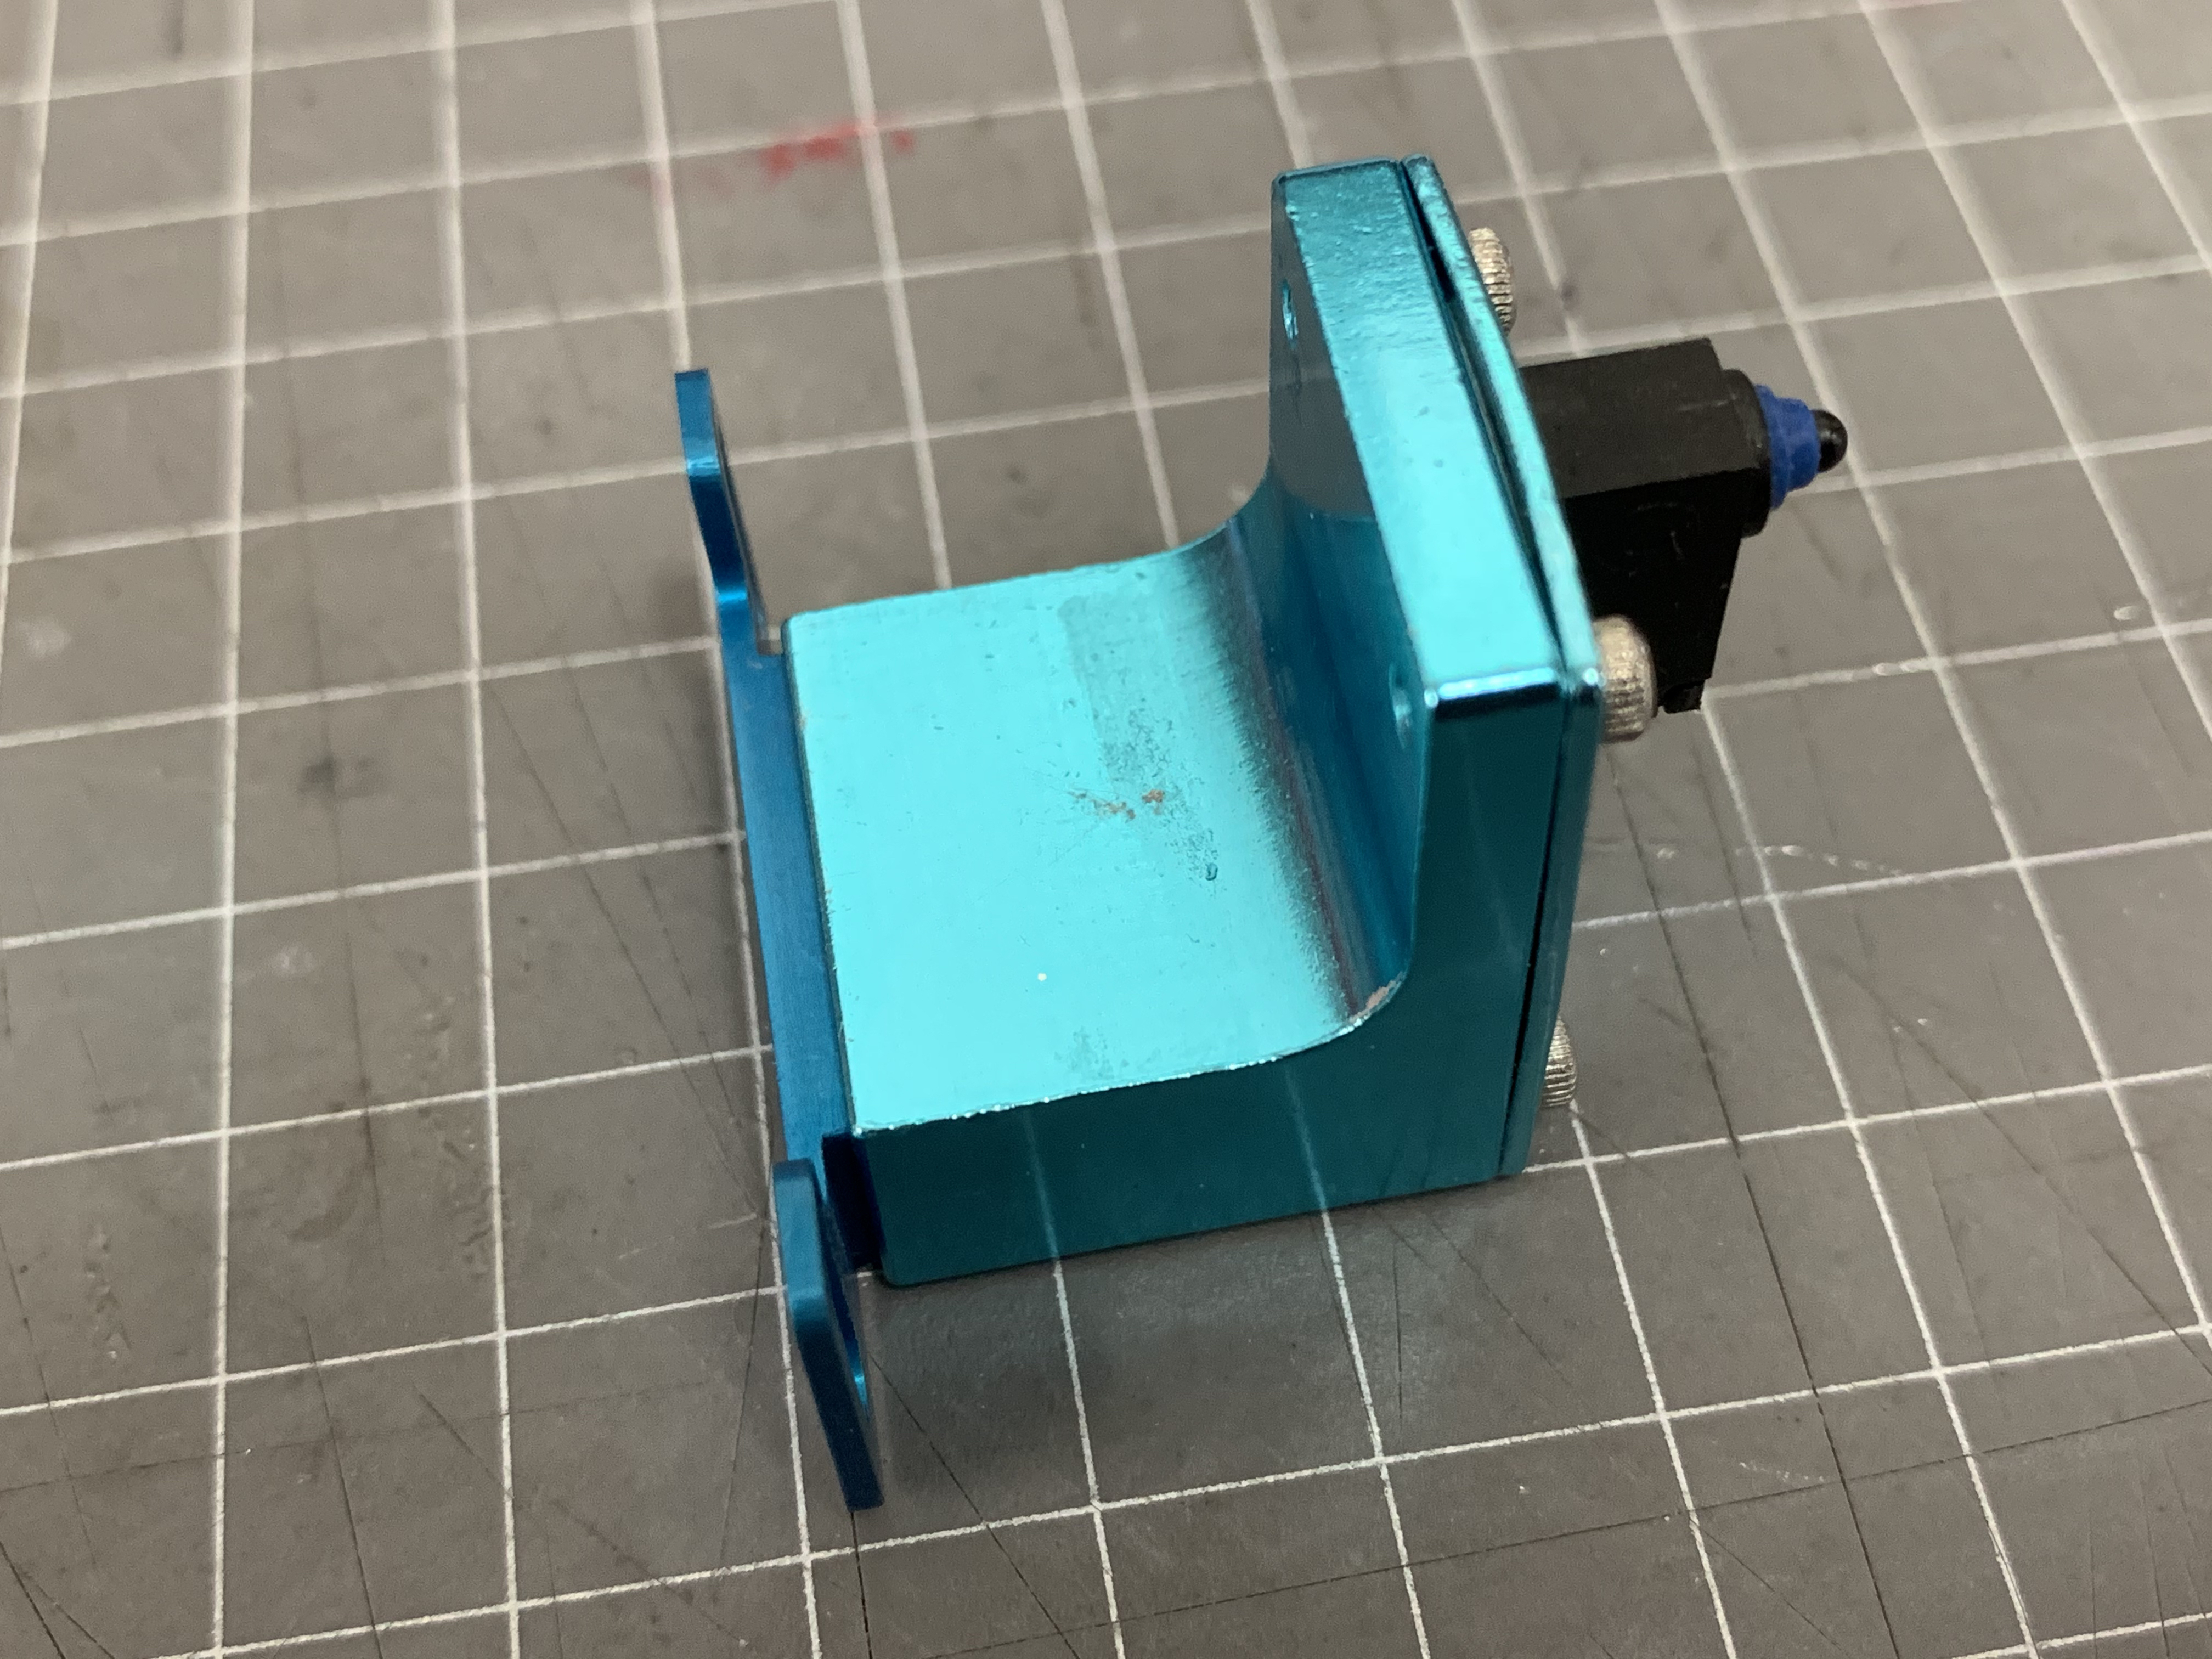
There is an inconsistency relating to the polarity of the magnet mounted within the Level sensor supplied with Predators. You may have an issue where the magnets of the mount I supply and the Level Sensor Switch repel each other. There is an easy fix for this as shown in these images >>>
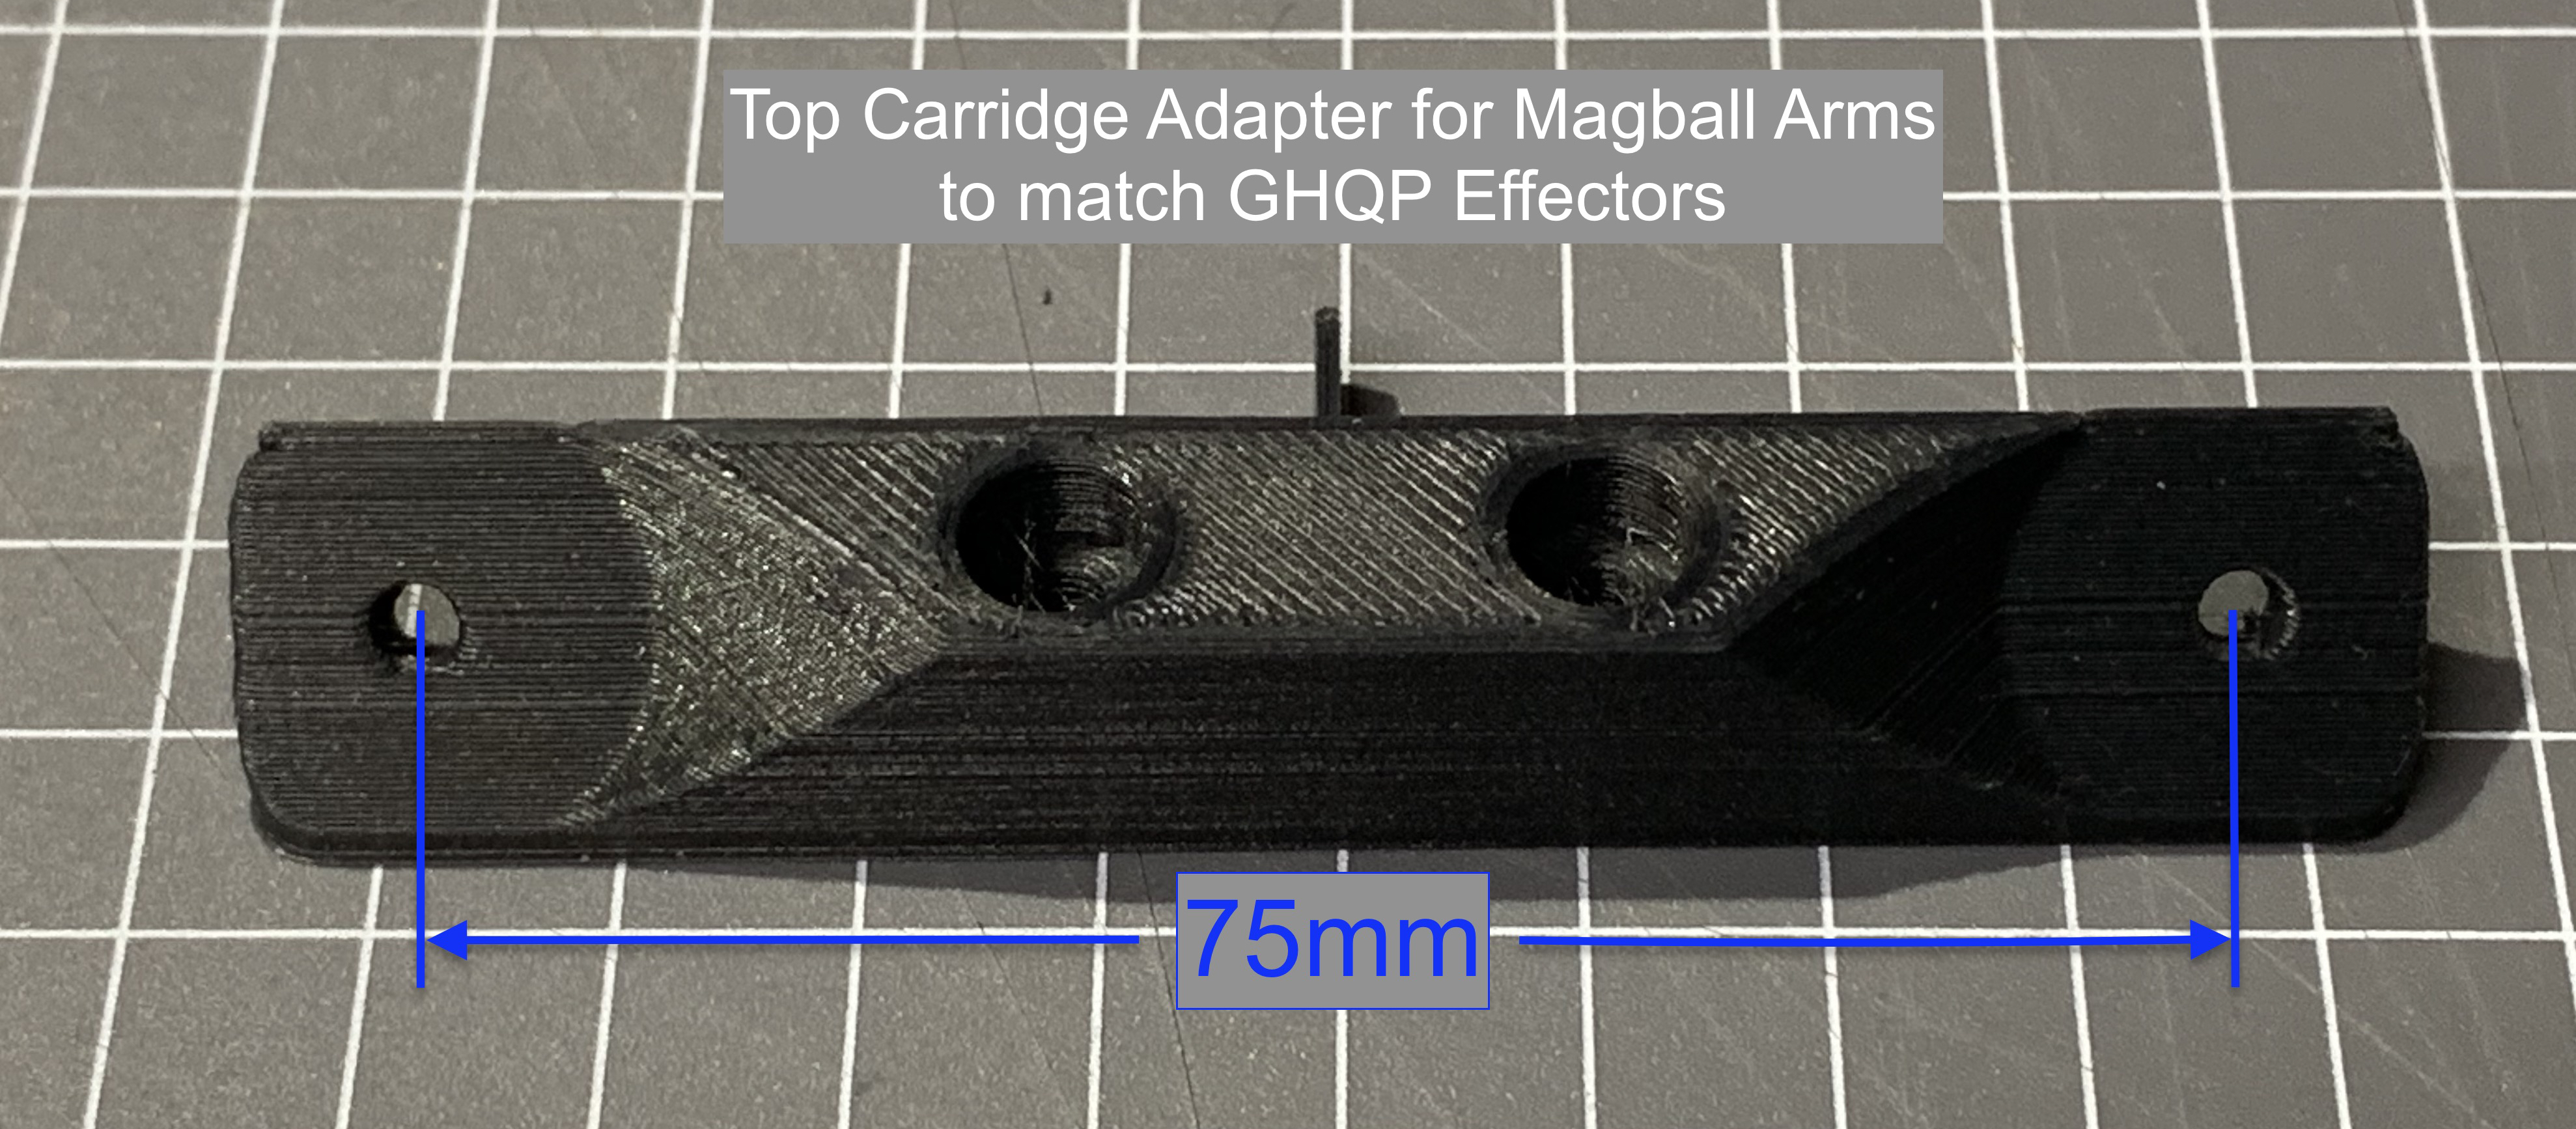
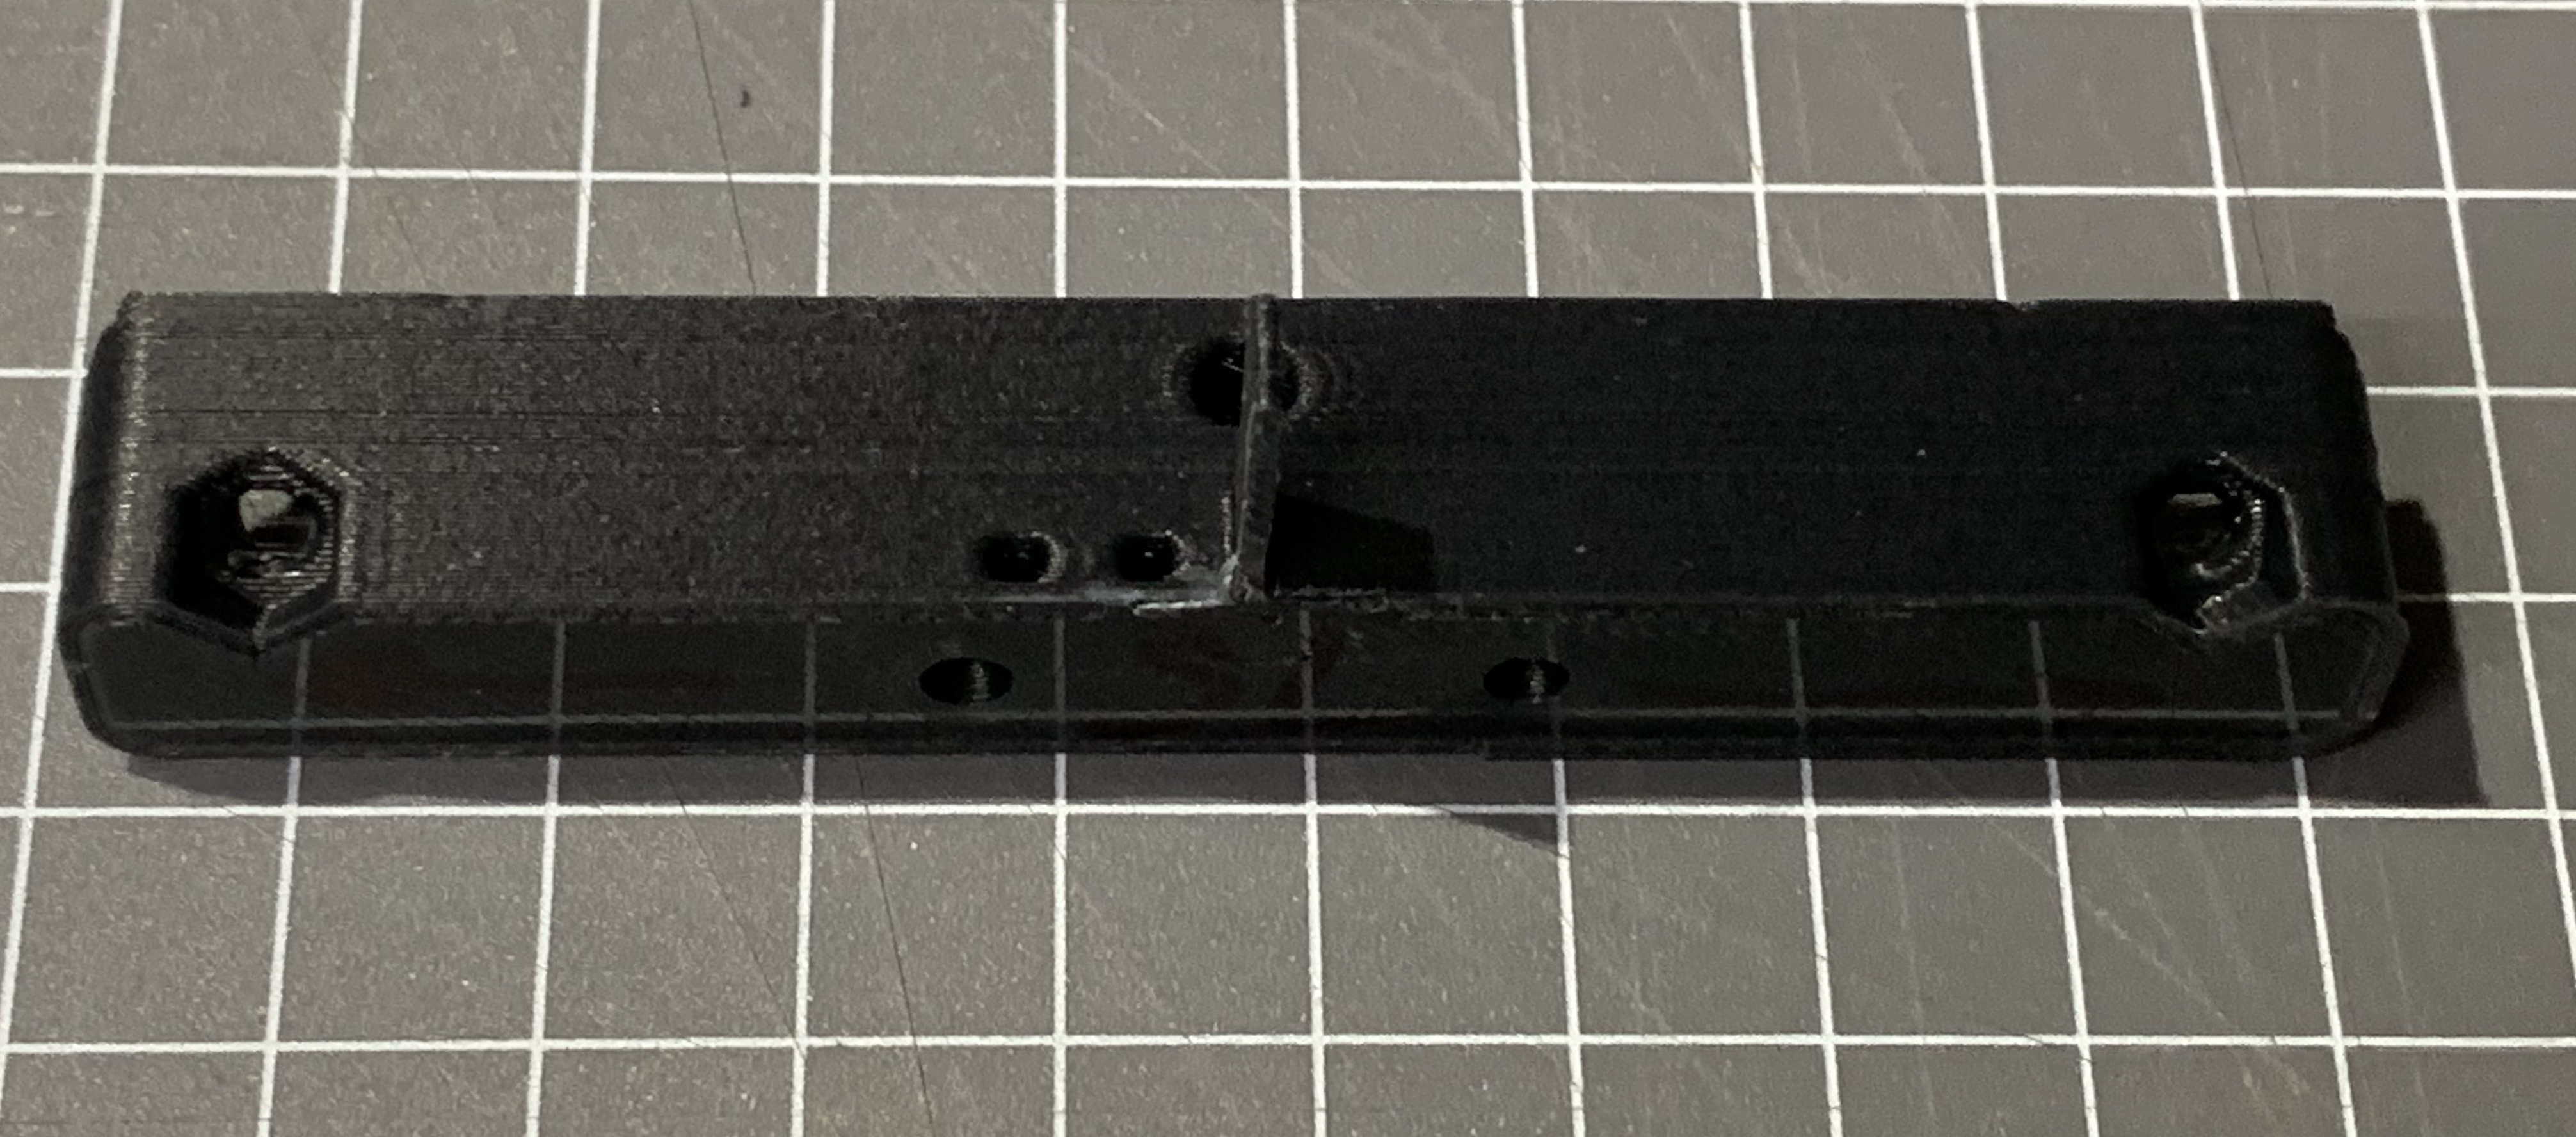
Modified Carriage Adapter version created Haydn Huntley to suit the specific 75mm arm spacing of my effectors. The original version by Haydn Huntley for his magball arms downloadable on Thingiverse has an arm spacing of 76mm and even though these do work with my effectors the 75mm Carriage Adapter version included with this note does match exactly my effectors spacing for magball arms. There is no other change except for the hole spacing.
A big thank you to Haydn Huntley for modifying and making this updated Carriage Adapter file for me to be able to make available to my effector customers. Anyone wanting to purchase Haydn's magball arms can visit his website: https://www.magballarms.com/
Or contact him directly via his email: haydn.huntley@gmail.com
DOWNLOAD the 75mm Adapter .stl file
Or contact him directly via his email: haydn.huntley@gmail.com
DOWNLOAD the 75mm Adapter .stl file
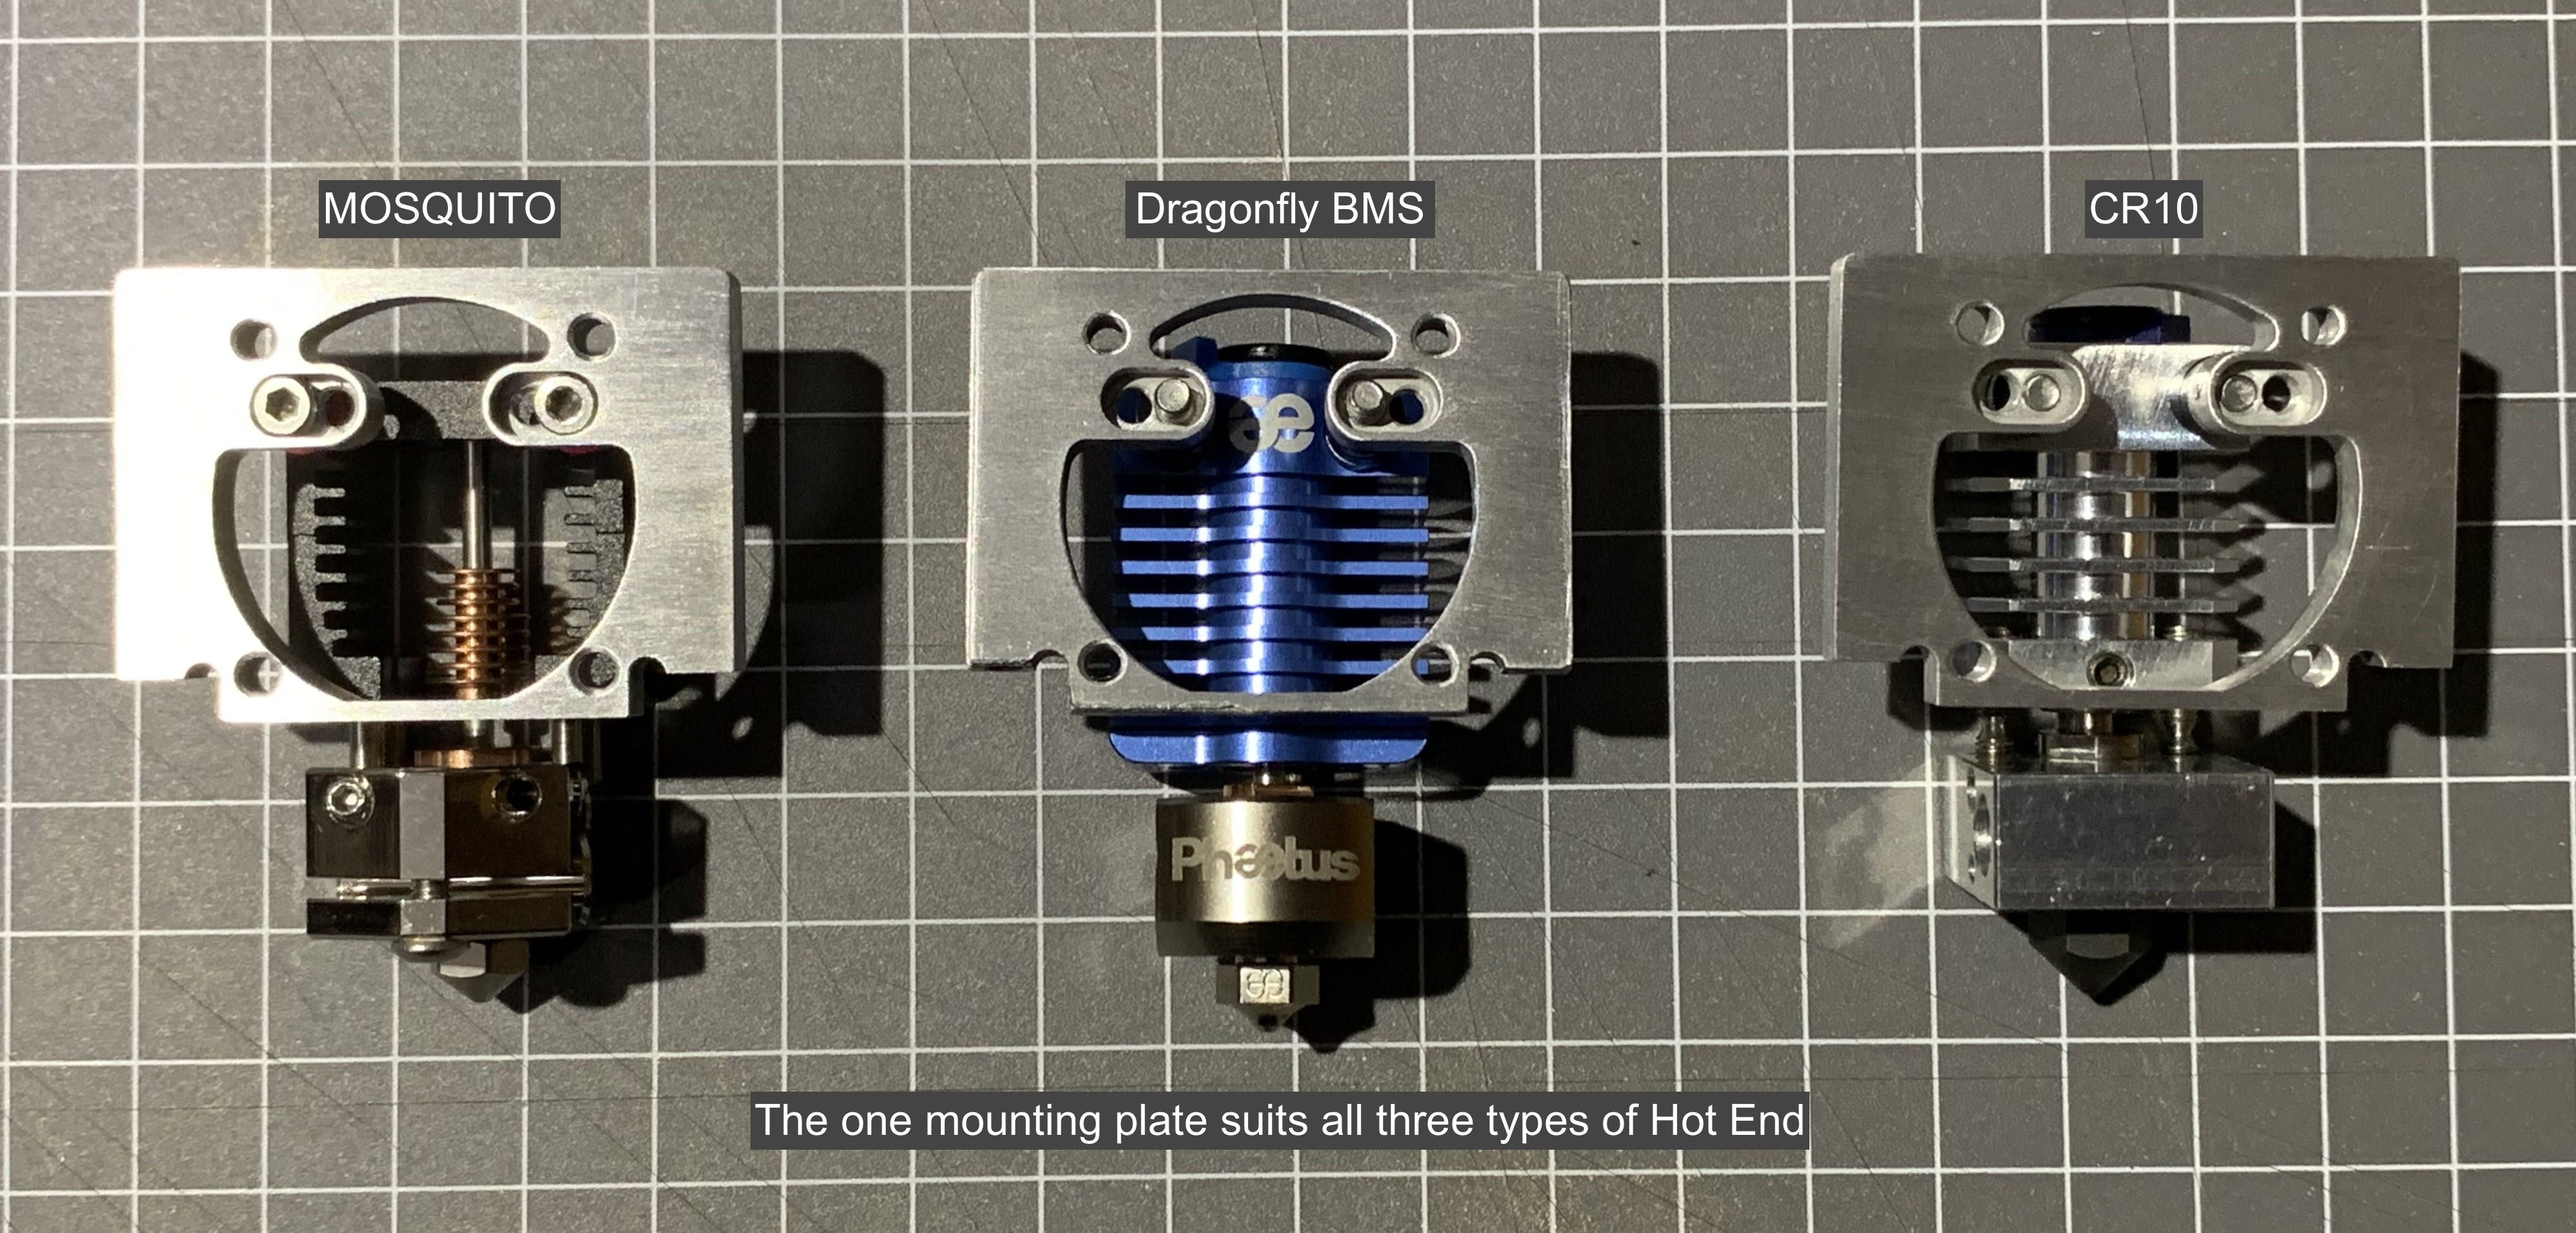
This Effector has been updated and now enables a variety of other and Groove Mount Hotends to be fitted.
For information and assembly instructions on this upgrade please refer to what is now the XR-Effector V2.
For information and assembly instructions on this upgrade please refer to what is now the XR-Effector V2.
ALSO FIT CR10 and DRAGONFLY BMS HOTENDS
Bed Level Sensor Magnetic Holder
You may find that when placing the Level Sensor Switch assembly on to the effector that the tip of the nozzle may make contact with the level sensor under body thus preventing it from sitting firmly into the magnetic holder. If this happens it is a simple matter of placing a small spacer under the magnetic holder to raise its level. Printable .stl files for this spacer are in the DOWNLOADS section below as well as a video.
You may find that when placing the Level Sensor Switch assembly on to the effector that the tip of the nozzle may make contact with the level sensor under body thus preventing it from sitting firmly into the magnetic holder. If this happens it is a simple matter of placing a small spacer under the magnetic holder to raise its level. Printable .stl files for this spacer are in the DOWNLOADS section below as well as a video.